
Once you have an inventory item, it’s time to create an option. Options are the part of your inventory that your customers can book. Activities with variations might use multiple options–for example, if your inventory item is a bus tour, its options may be the times of day the bus departs. Activities that don’t vary except by price tier may only need one option.
Options are where you set your activity’s basic pricing and availability.
To add bookable options to an inventory item, navigate to that item’s details page.
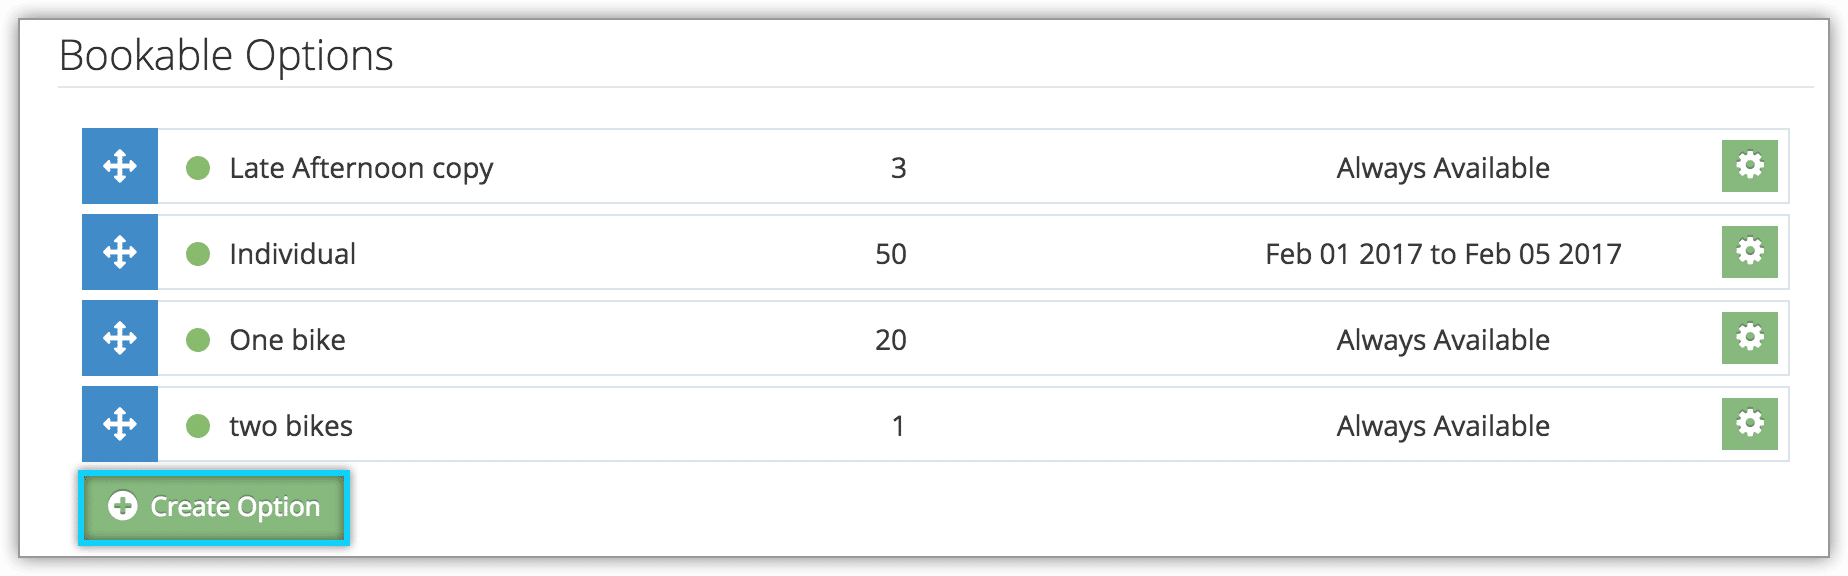
Under the heading Bookable Options you can see any options that are already associated with the item. To add another, click Create Option.
Creating the basic option
First, enter a few basic details about your new option:

- Name: (1) This is what you will choose in the point of sale, and what your customers will select when booking. It should identify what makes this option different from any others–for example, its start time.
- Duration: (2) The amount of time the option will take, in minutes, hours or days (3).This will affect availability if you’re using resource management.
Under advanced options, you can set up deposits, minimum or maximum guests, block sizes, and default booking status. If you’re curious about whether any of these settings are relevant to your business, reach out to our support team to discuss your setup.
Choosing availability types
Once you’ve worked out the basics, it’s time to select the type of availability this option will use:

Daily Availability: (1) This is the standard type of availability. You can choose your option’s available dates. Availability will dynamically adjust based on how many bookings you get, and you can also make adjustments for specific dates or ranges.
Resource Availability: (2) If your event’s availability depends on spaces in a vehicle, staffing numbers, tables, rentals, or other resources, it should use resource availability. Availability will dynamically adjust based on how many spaces your assigned resources have available. You can still choose available dates and make adjustments.
Open Availability: (3) If your customers can book in advance and show up any time your business is open, your option should use open availability. Availability will only adjust based on how many spaces are sold. These options aren’t associated with dates, and guests won’t be checked in on arrival. Instead, their ticket will be marked as used so they can’t visit again on the same ticket.
Each of these types of availability has different required information. Continue to the articles for Resource Availability or Open Availability if your event or rental is suited to either.
For Daily Availability, follow these steps:
1. Click Daily Availability as the Availability Type.

2. Enter the number of spaces that should be available on days this option is available to be booked in the Daily Availability field (1).
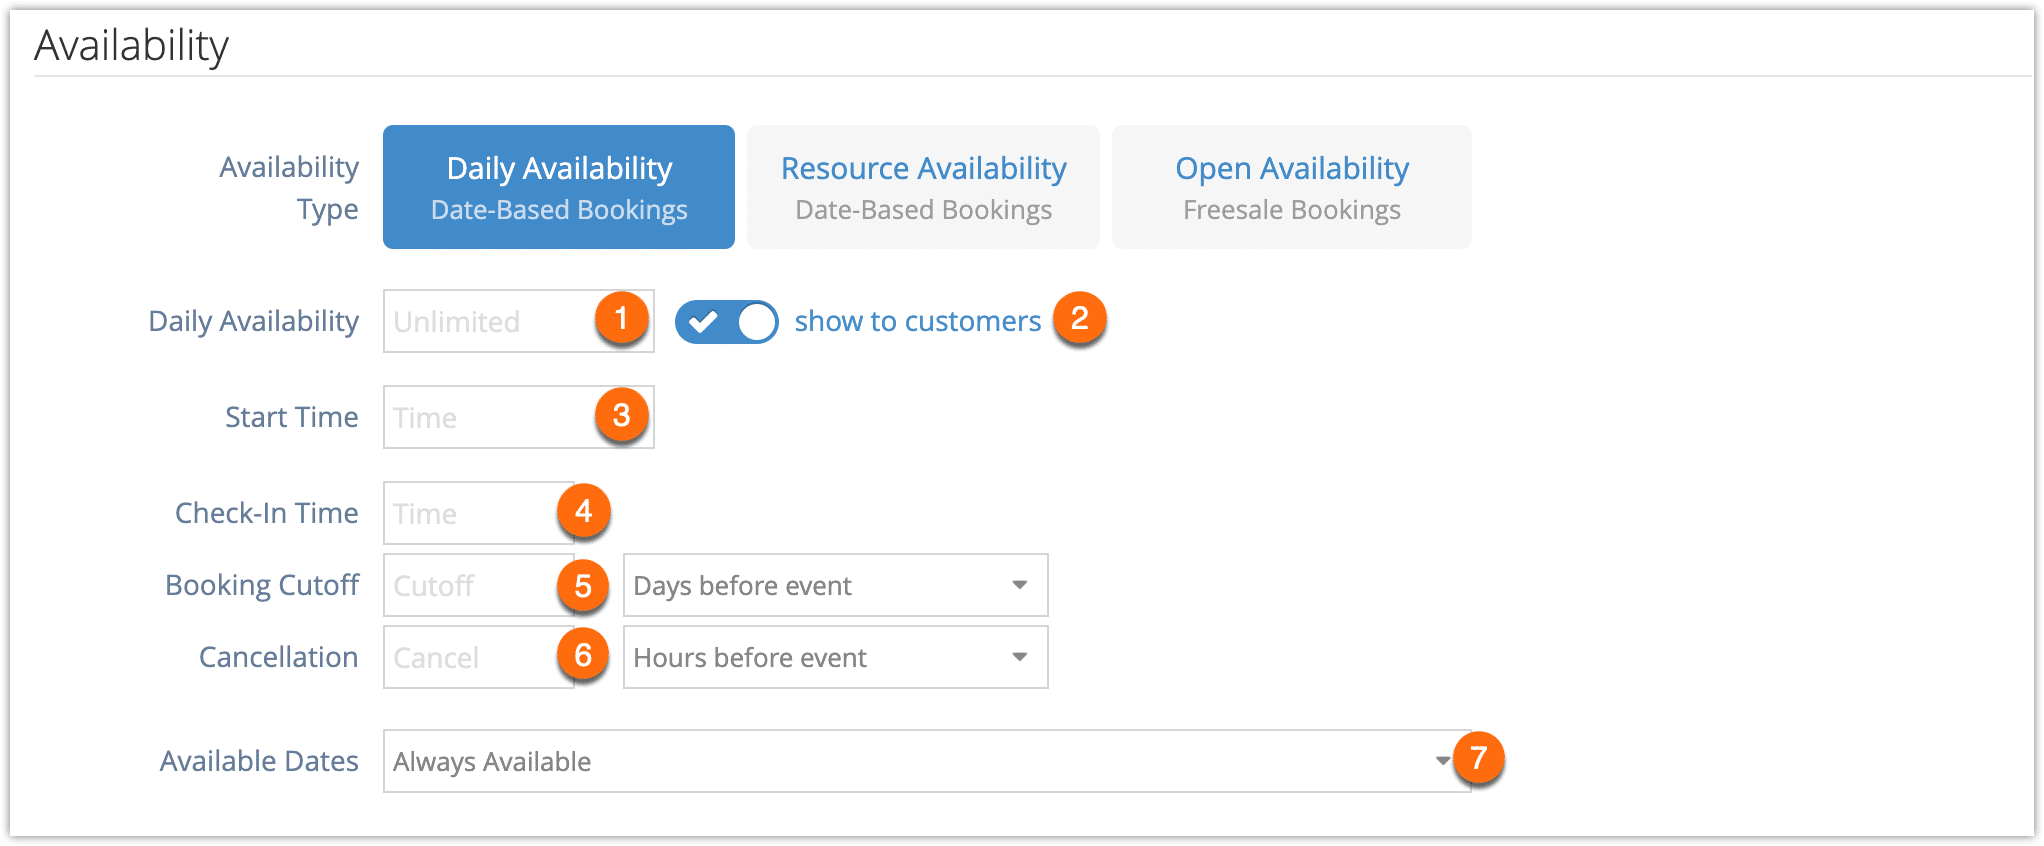
3. Toggle whether or not the remaining availability should be shown to customers when they book (2).
4. Add the start time of the event (3).
5. Add the check-in time of the event (4), if needed. If you want to ensure customers can’t be checked in before this time, you can also enable that in your system settings.
6. Add a booking cutoff, if needed (5). This is the number of days or hours before the event where customers can no longer make bookings. If the option has a start time, this will be the number of hours or days before that time. Otherwise, it will be the number of hours or days before 00:01 the day of the event.
7. Add a cancellation cutoff (6), if needed. This is the number of days or hours before the event when it can no longer be cancelled. This will not prevent cancellations, but it may be useful information for your users and resellers.
8. Select your available dates (7). Your option can be available every day, on one single date, for a date range, on certain days of the week, or on selected dates. After you create the option, you can also change the available days with rules or adjustments.
Adding details
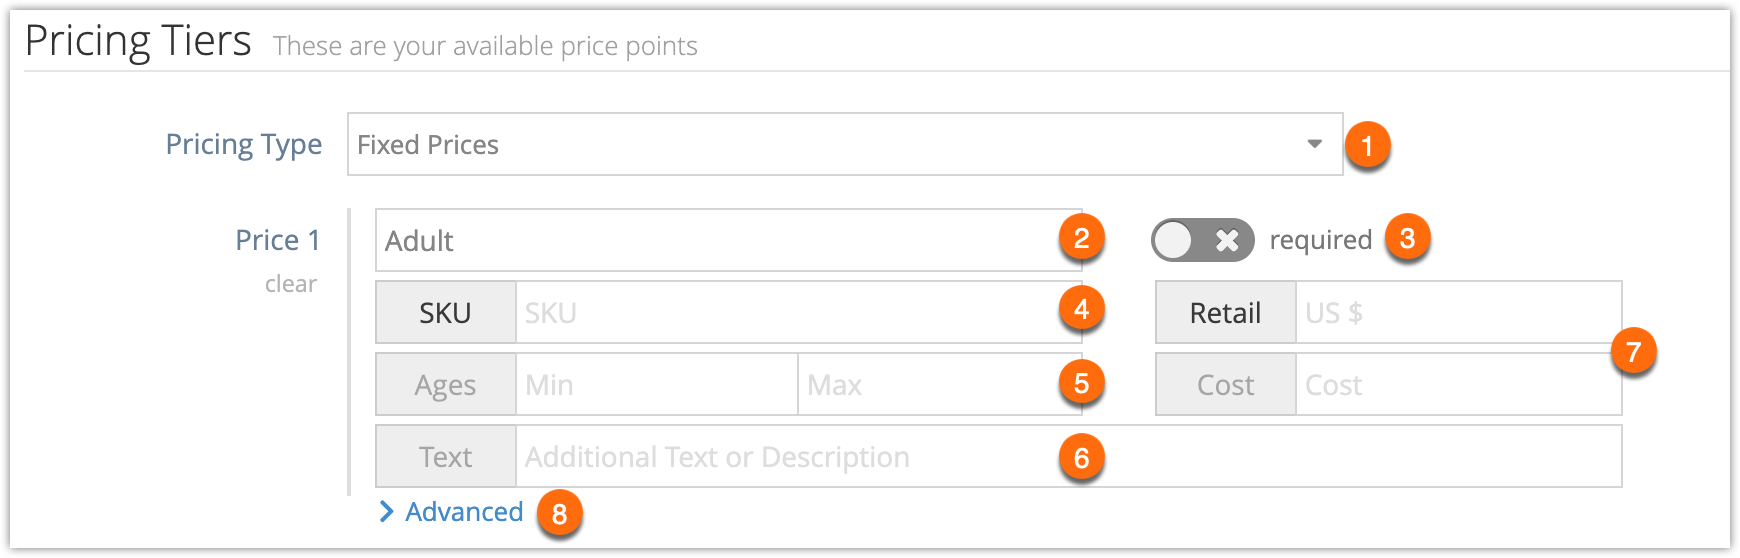
Pricing Tiers let you specify prices for different categories of guests. Most inventory will use Fixed Prices for Pricing Type (1), but if you have daily pricing sheets from a vendor, you can also use Daily Prices.
The pricing label (2) should specify who or what the price applies to–for instance, Adult, Child or Senior passengers, or varieties of a rental, like single or double kayaks.
You can toggle whether the price level is required or not (3). For example, if at least one adult or one senior ticket must be booked, then the toggle for both the Adult and Senior price tiers should be set to “required.”
You can also add a SKU (4), specify age ranges (5), and add any information or description (6) you’d like to show on the tour details page of your booking website.
You can also add the retail/cost prices (7) for these tiers. Only the retail price is required.

Finally, under Advanced (8), you can set how many waivers should be sent per booking of this tier. You can also set a strikethrough price–the original price for a discounted tier, for example.
You can enable resource availability on the price tier, if you want to associate a resource–for example, adult or children’s lifejackets–with a price tier. Price tier resources can also be used to keep track of varieties of rentals, like the single or double kayak example above.

You can add up to nine price tiers per option.
Pricing Bundles allow you to combine pricing tiers to offer discounted rate for family bundles and other combinations. Packages may be a better approach if your bundles would include different inventory rather than different pricing tiers.

Line Items are taxes or fees that will be applied to bookings that include this option.

Attached Merchandise allows you to always include specific merchandise in a booking when it’s booked through the Rezgo point of sale.
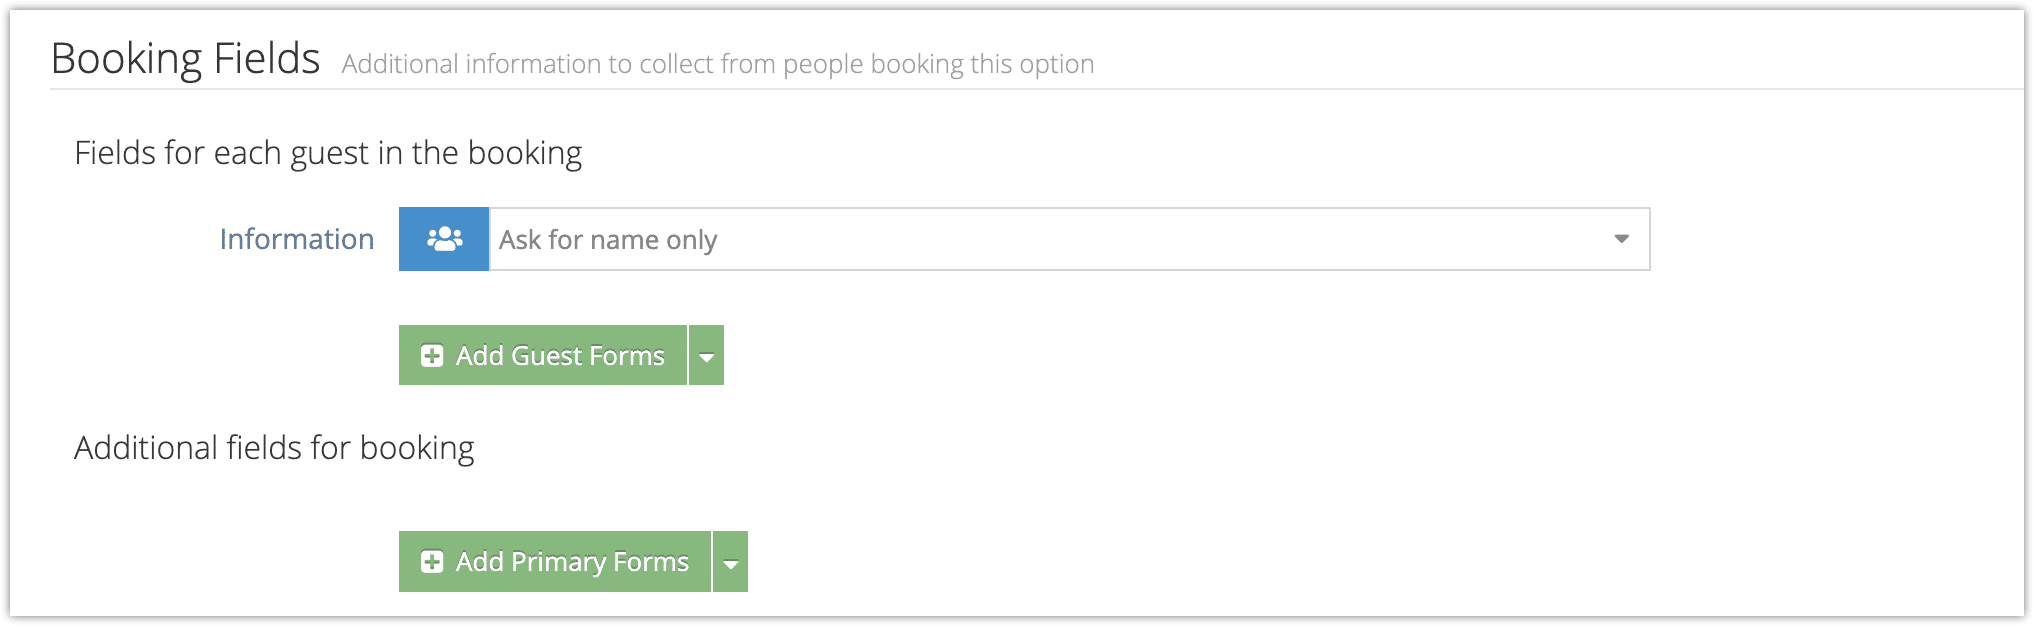
Booking fields are fields that will be asked of the customer that books the option. You can set the information that will always be asked, if any, and you can also add additional fields.
- Guest Forms need to be filled out for each guest that is included in the group booking.
- Primary Forms are asked once for the whole booking.
Finally, there are several option settings you can configure:
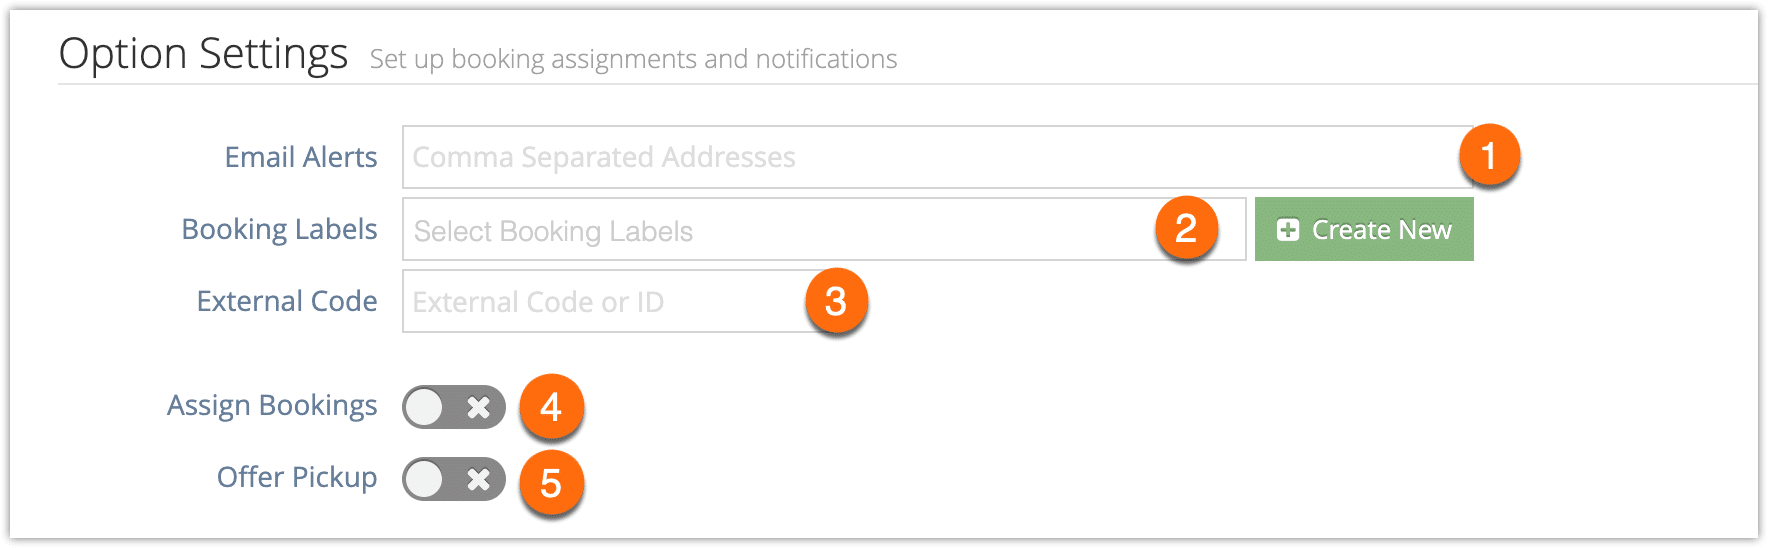
Email Alerts (1) should list any email address that need to receive a notification whenever the option is booked.
Booking Labels (2) are labels that will be applied to any booking that includes this option.
External Code (3) should include any code or ID you need associated with the option, for use with third-party APIs or internal tracking.
Assign Bookings (4) allows you to set where and to whom front-end bookings should be assigned.
Offer Pickup (5) lets you set locations your customers can select to be picked up before the tour or activity.
After you fill out all the necessary details, click Create Option.
From the Inventory list
You can also create options directly from the inventory list.
1. Navigate to Inventory in the main menu.
2. Click the action button next to the the item you want to add an action to.
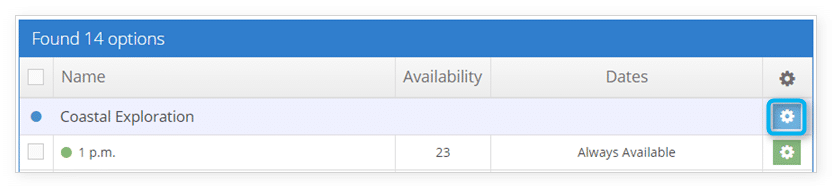
3. Click Create Option.
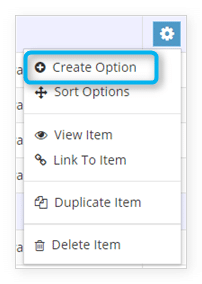
4. This will take you to the Create New Option page, where you can continue with the process detailed above.