If your company sells physical goods or other items that are sold separately from specific tours or activities, you can list them in the Rezgo point of sale.
First, navigate to Merchandise in the main menu. If that menu item isn’t available, your user account may not have access, or you may need to enable it by customizing your menu layout.
Note: The merchandise system is best used for physical goods that have stock to track. For services or rentals that go along with specific inventory, we recommend using booking fields with price checkboxes instead.
1. Click Create Merchandise.

2. Enter basic information for the merchandise:
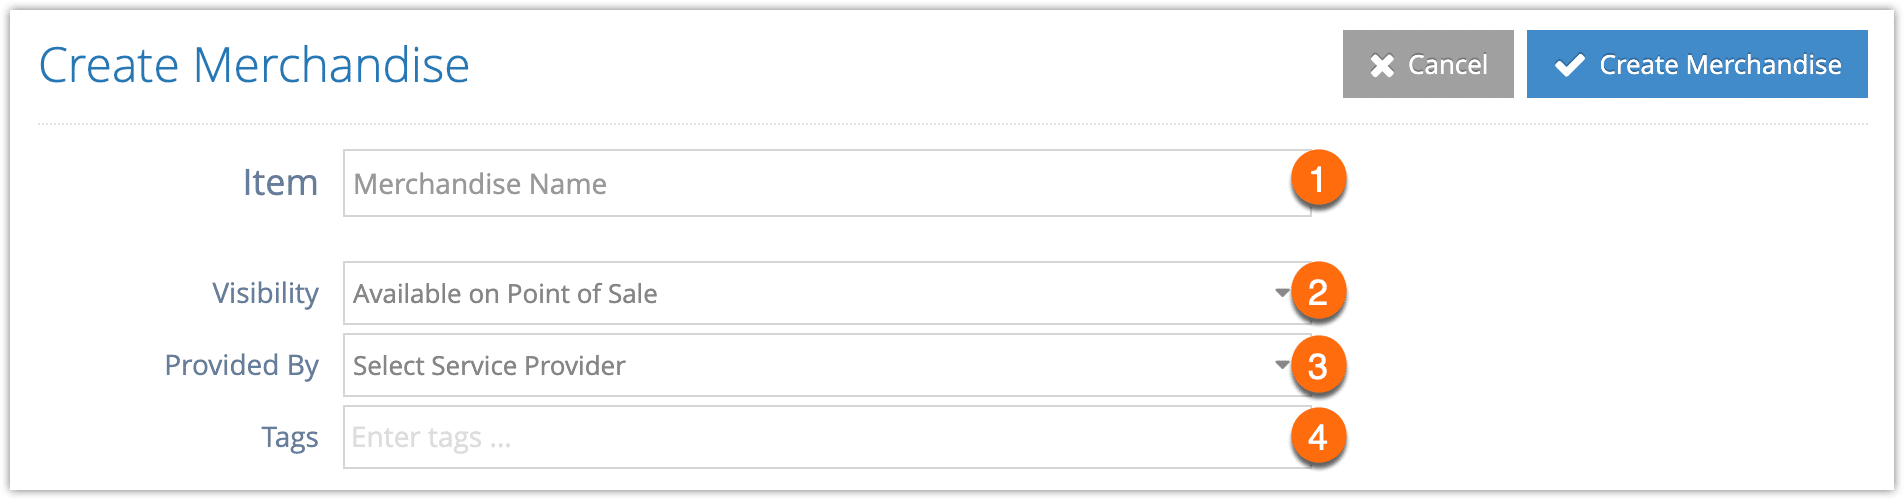
- Enter the name of the merchandise (1).
- Select its visibility (2) from the following:
- Available on Point of Sale
- Not Available for Sale.
- Select a service provider, if applicable (3).
- Enter any tags for filtering and search purposes (4).
3. Enter the merchandise details:
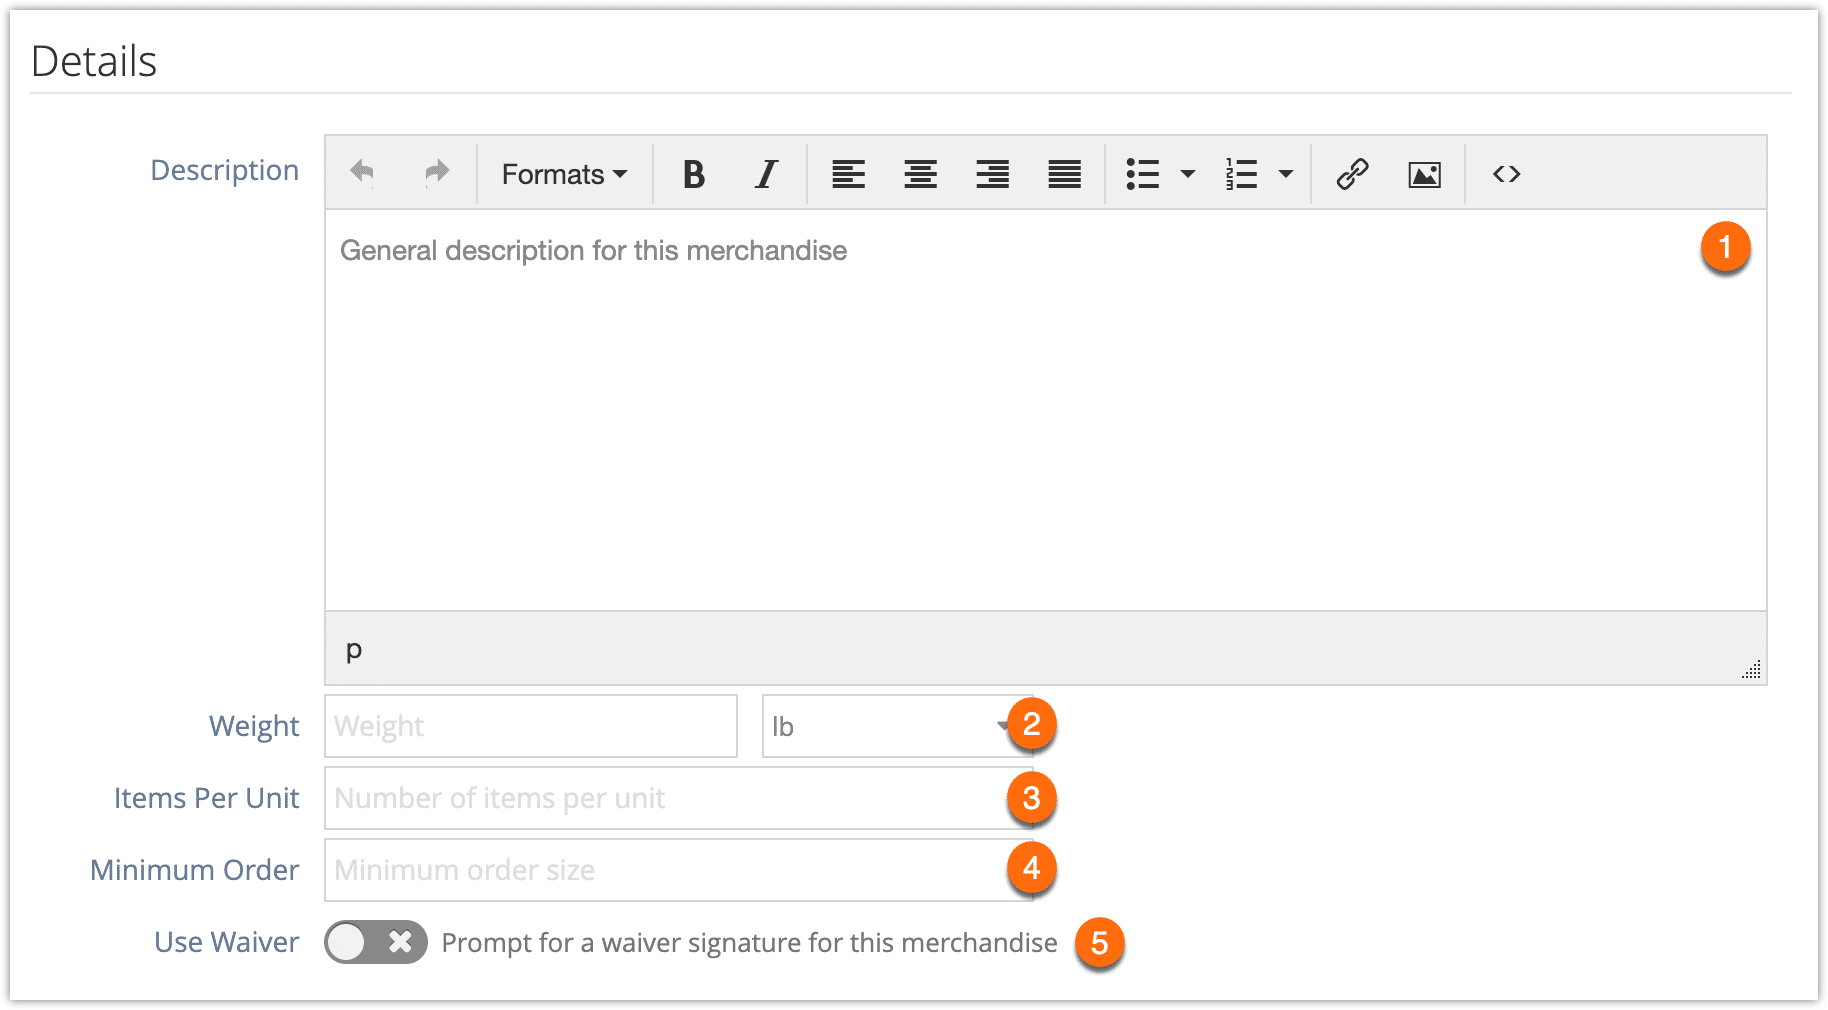
- Enter a description (1). This will be the merchandise description on its listing.
- Enter the item’s weight (2) in pounds, grams, kilograms, or ounces and select the appropriate unit of measurement. This information is currently only for your records.
- Enter the number of items per unit (3) for this merchandise (how many individual pieces are included in a single unit of the merchandise, for calculating weight).
- Enter the minimum order (4). This is the minimum number of units of the merchandise that can be transferred to or between desks.
- Toggle whether a signable waiver should be provided for purchases of this merchandise (5).
4. Toggle whether the merchandise is redeemable (1). If merchandise is redeemable, a voucher will be issued that can be checked in when the customer uses it.
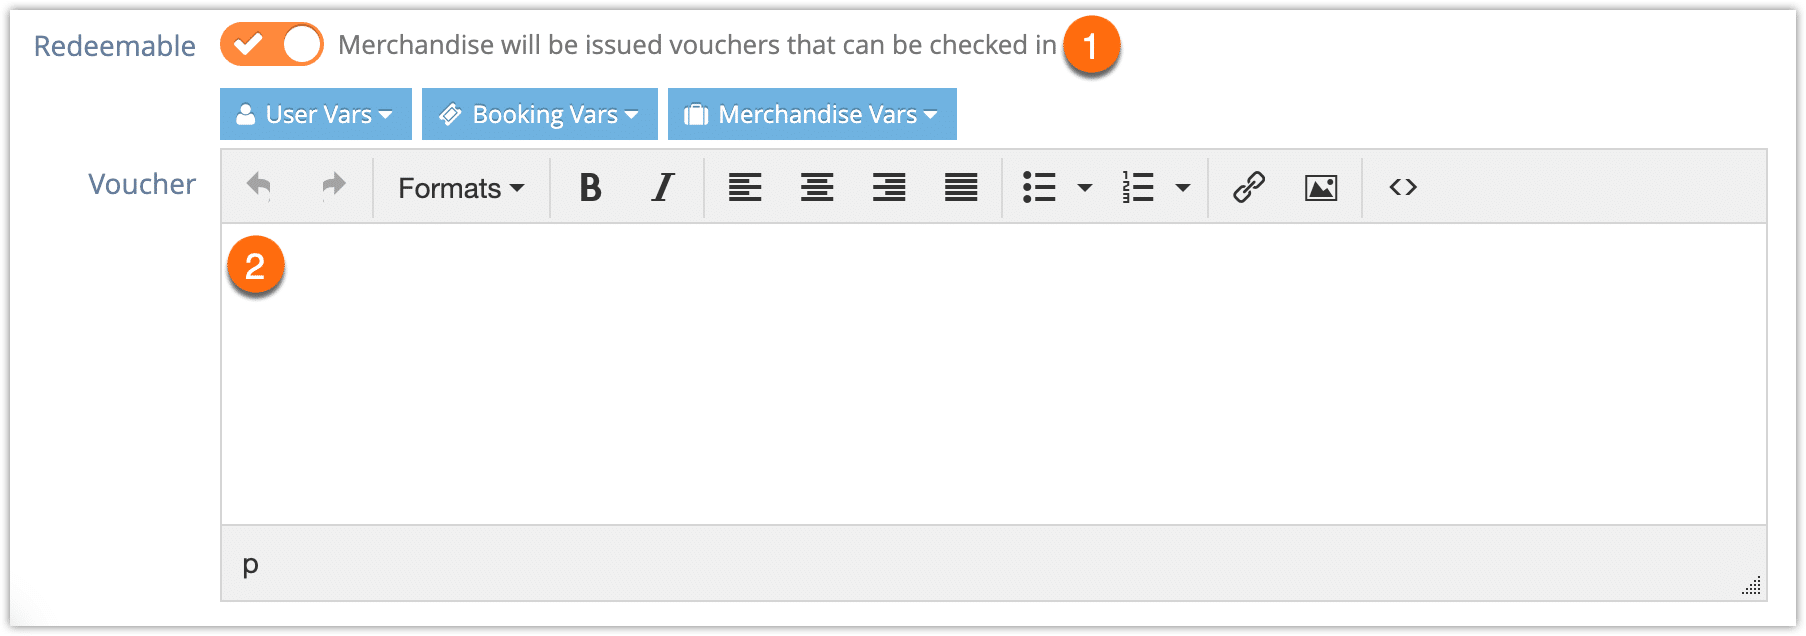
If the merchandise is redeemable, you can enter any content and variables you want to include on the voucher (2). This content will be displayed within the Merchandise Voucher template.
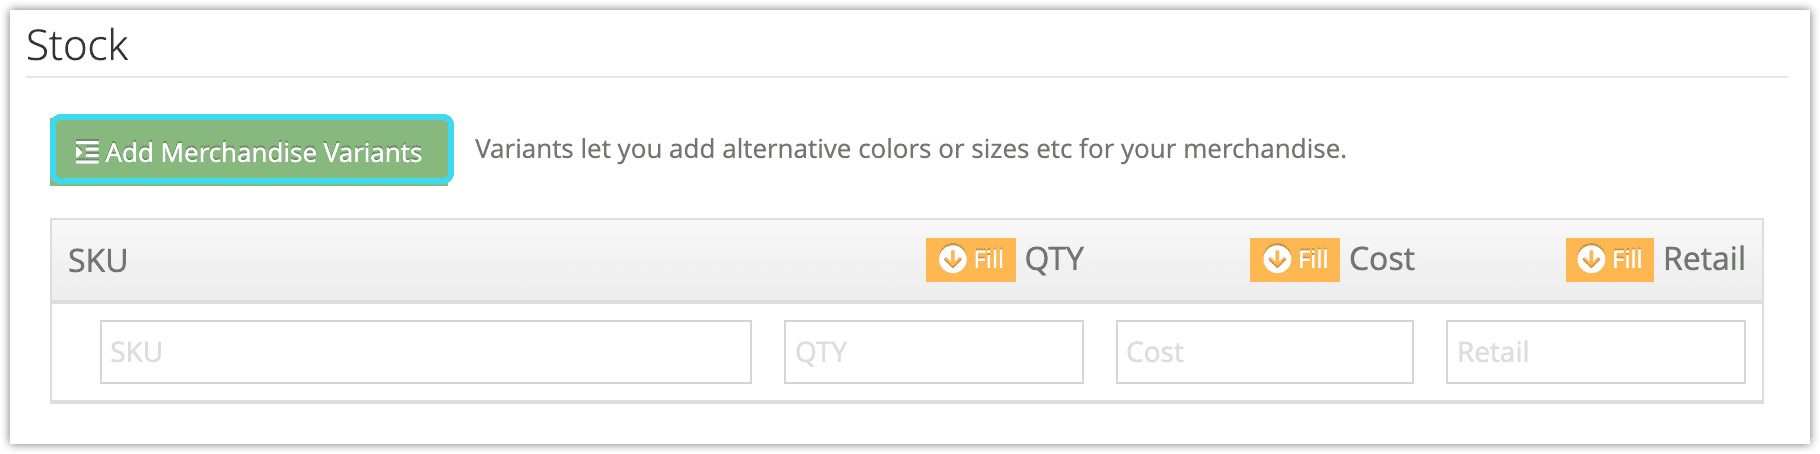
5. Click Add Merchandise Variants if the merchandise has more than one variant (If not, continue to step 8).
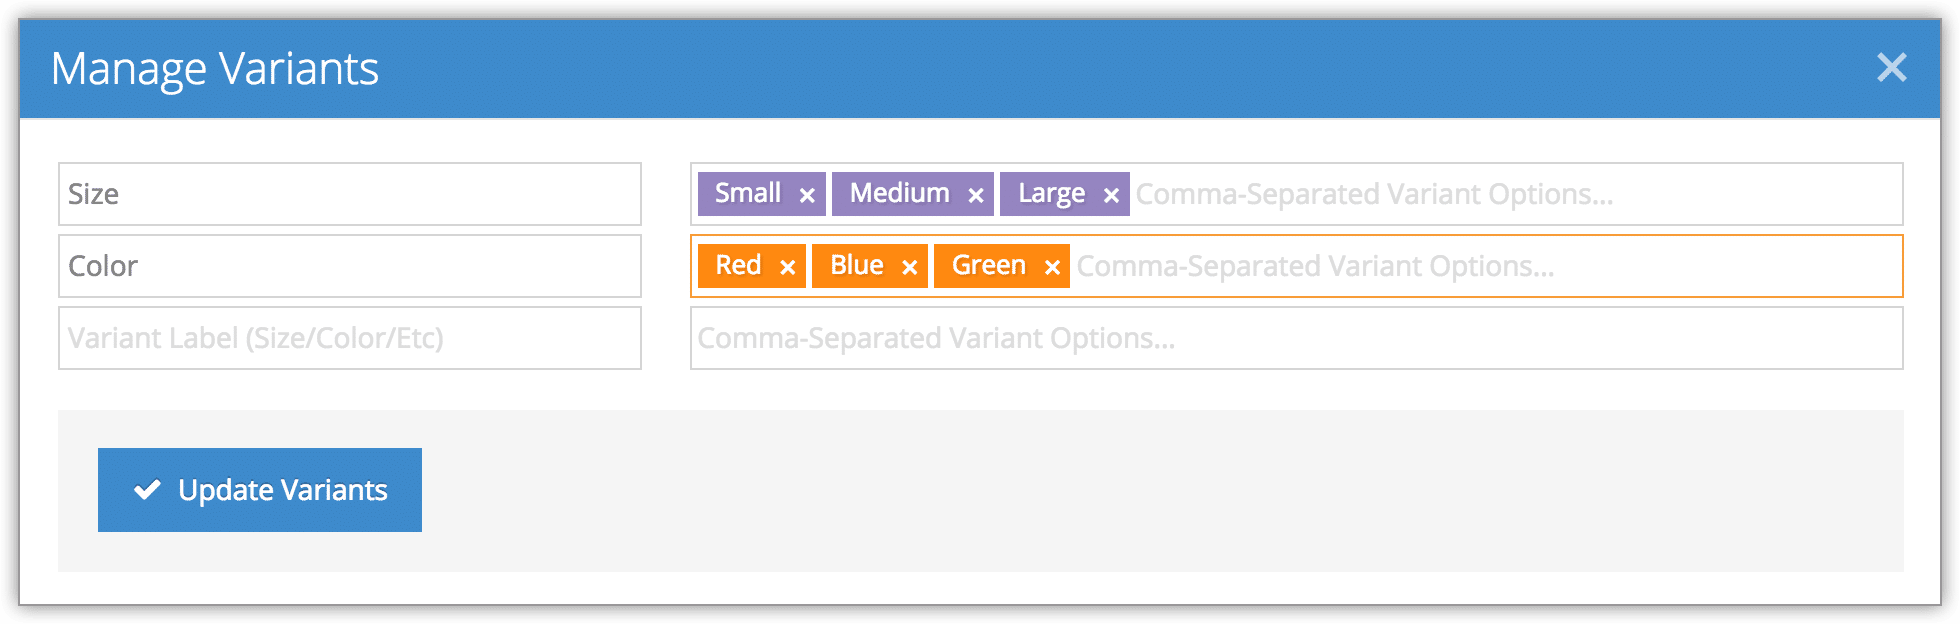
6. Add the variants.
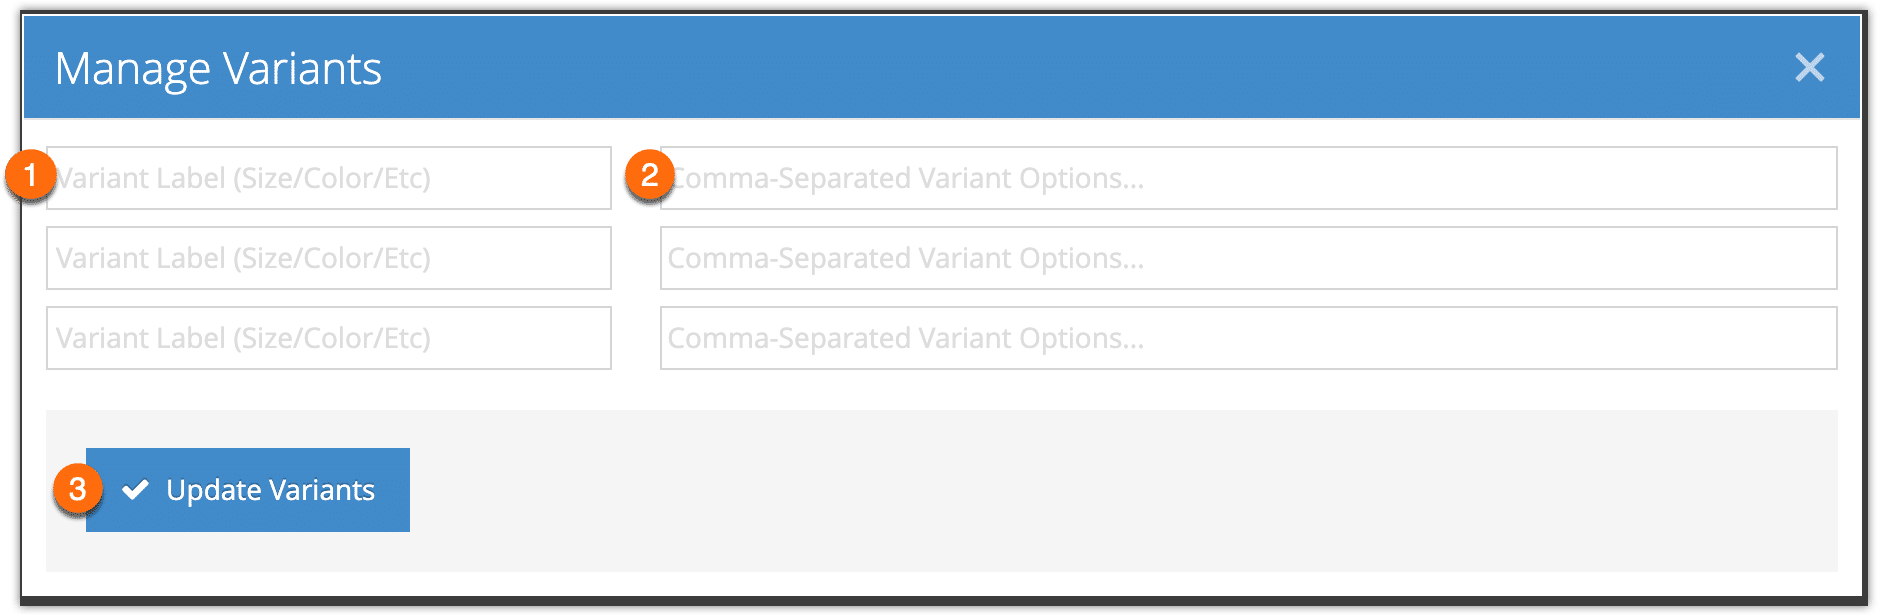
- Enter up to three variant labels (1). These may be variables like Size or Color.
- Enter the variant options separated by commas (2). For example, Small, Medium, Large or Red, Blue, Green.
- Click Update Variants when you finish adding all variant options.
7. Enter details for all variants that your company offers.

- Enter the variant’s SKU (1).
- Enter the quantity of the variant you currently have in stock (2).
- Enter the variant’s cost price (3).
- Enter the variant’s retail price (4).
8. Upload product images by dragging images into the upload box or clicking to open the file browser.
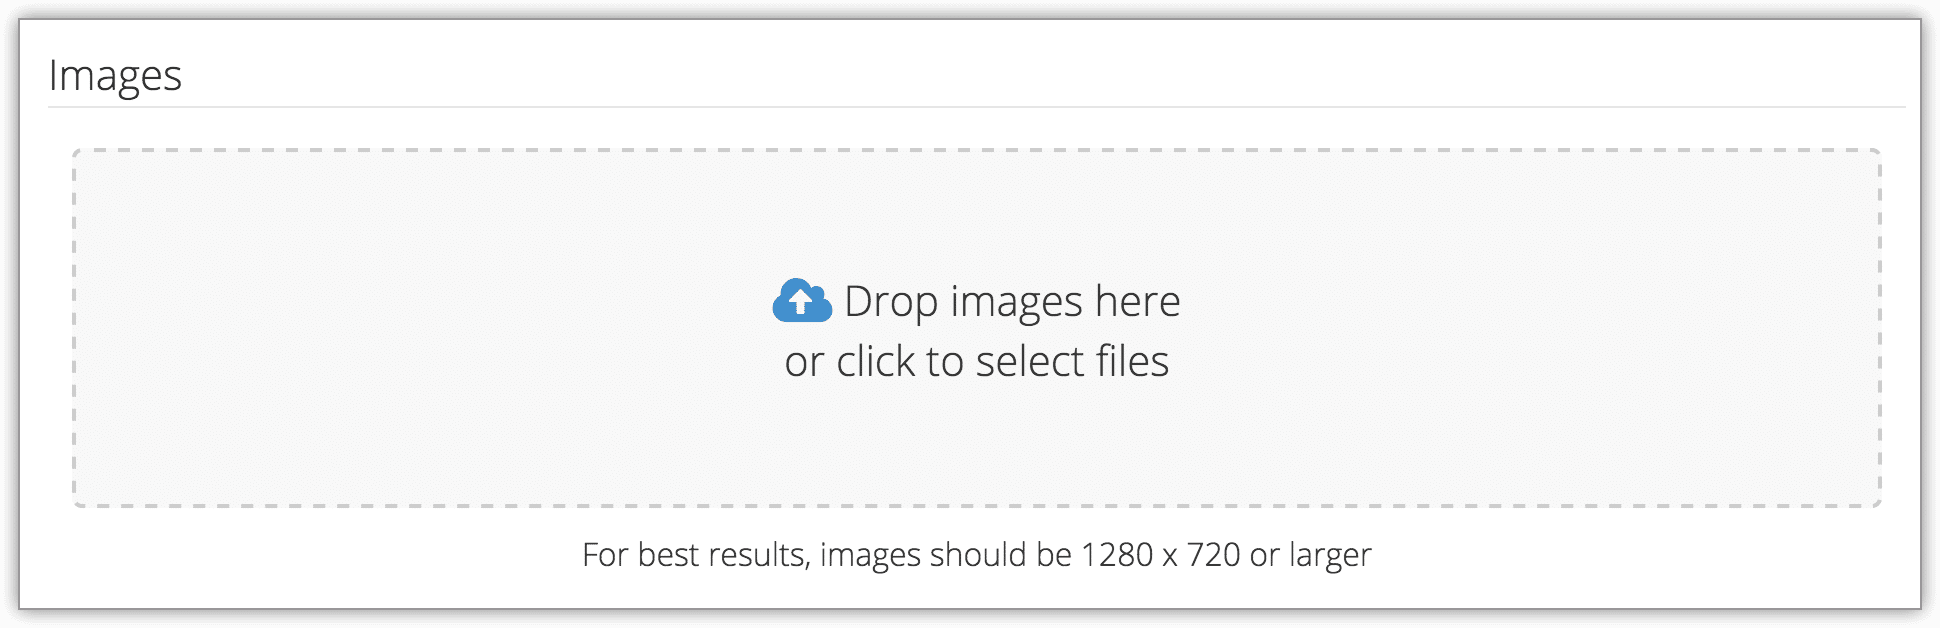
9. Make any necessary adjustments to the product images.
10. Click Create Merchandise.
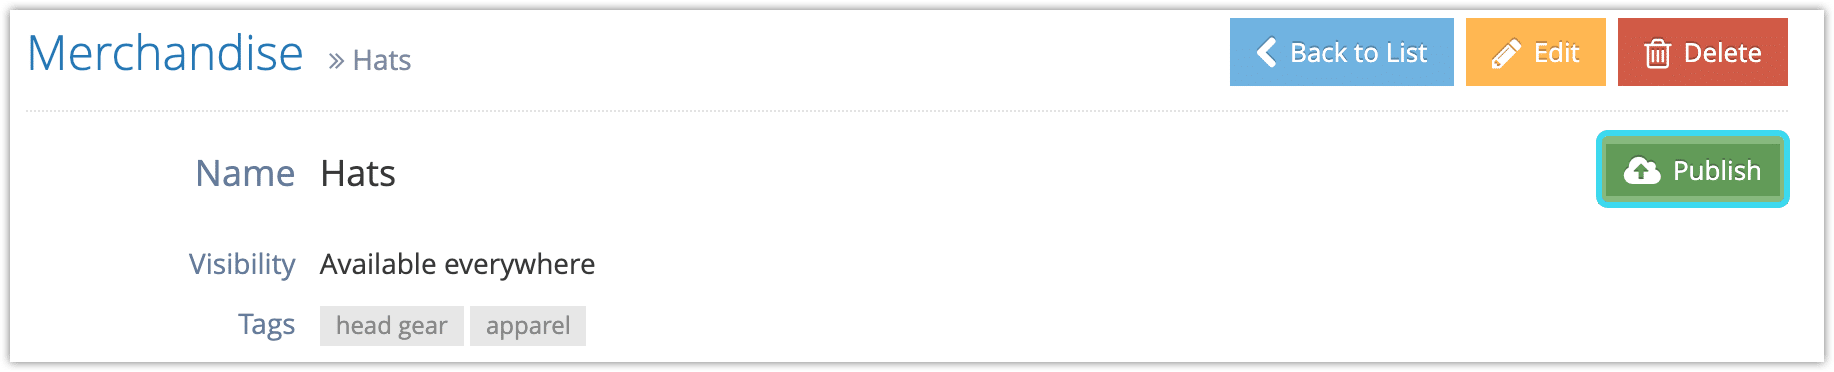
When you’re ready to make the merchandise available for sale, click Publish.