
If the default layout of Rezgo’s main menu isn’t ideal for your company, you can change it to better meet your needs.
First, navigate to Settings in the main menu and click Title & Sidebar.
Here, you can change several elements of the Rezgo experience:
Sidebar Quick Links
These are the two buttons that appear at the top of the Rezgo menu. By default, they link to the Rezgo point of sale and your pinned content.
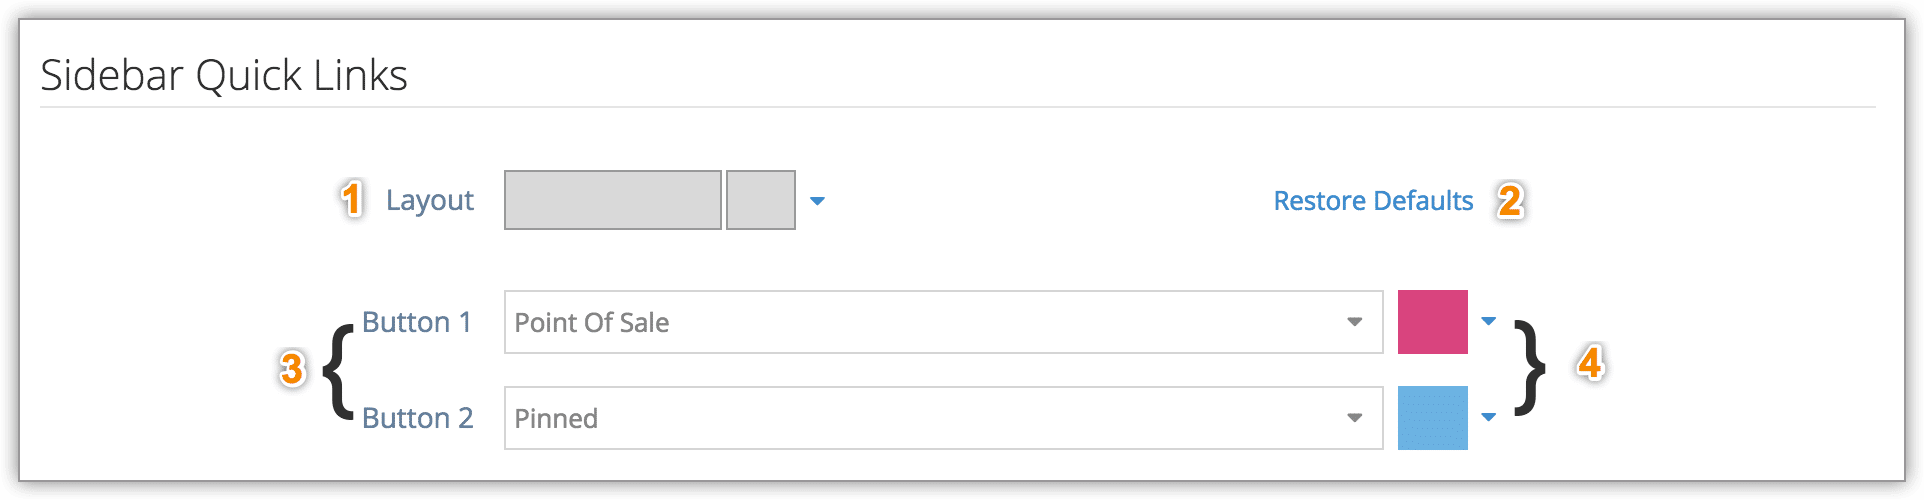
Layout (1): Here, you can set the layout of the buttons, deciding whether one should be larger than the other or they should be of equal size. You can also add up to two additional buttons.
Restore Defaults (2): If you don’t like the changes that have been made, click this to return the settings to their default state.
Buttons (3): Here, you can select which links should be available on these buttons.
Colors (4): Select the buttons’ colors.
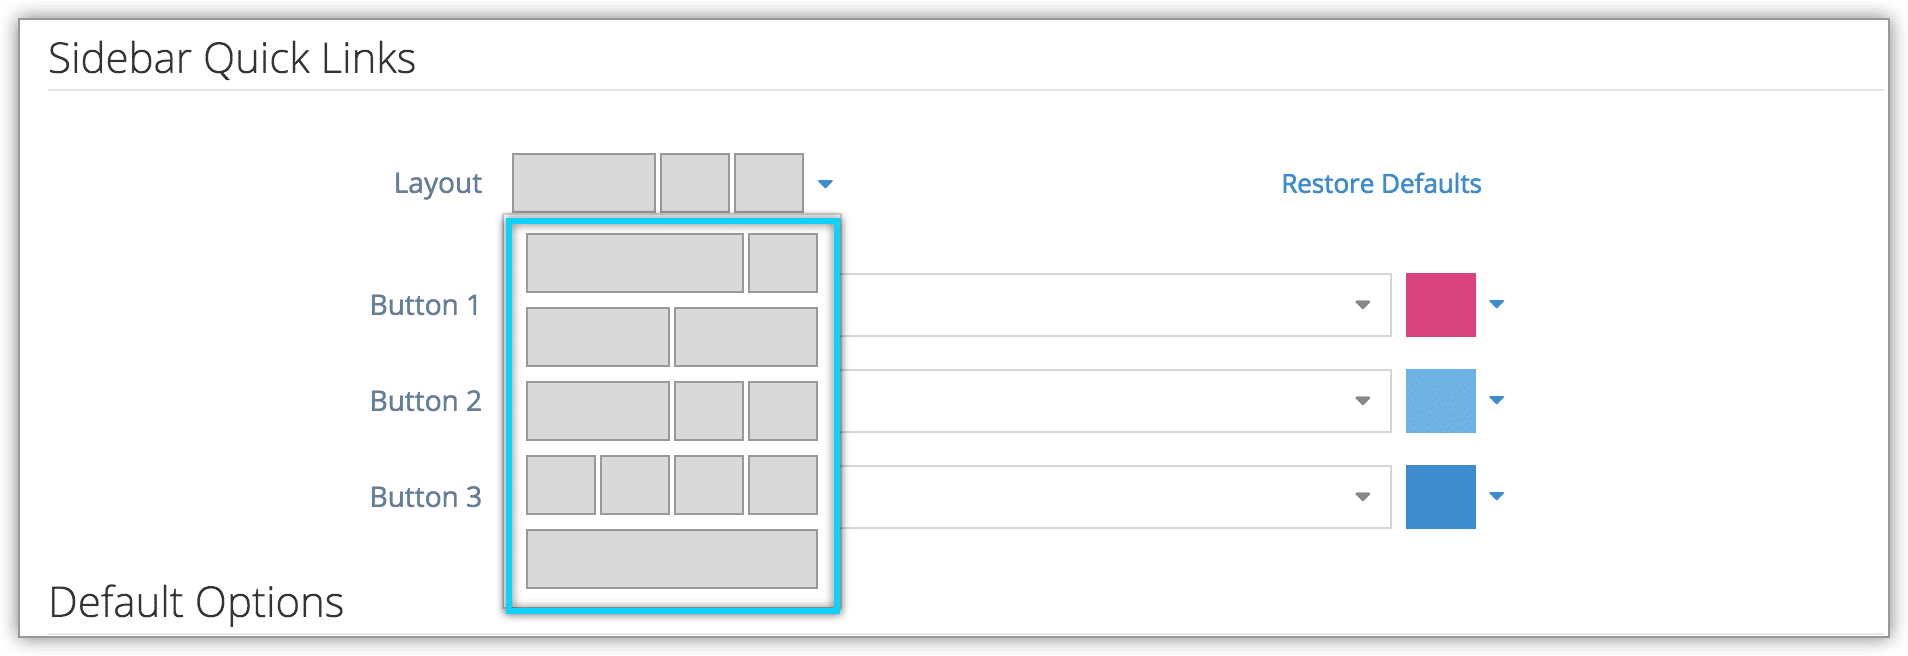
An example of the menu with customized colors and four buttons that link to Bookings, Calendar, Profile and Missed Alerts:

Default Options
Home: This is the page that will load when users first open or log into Rezgo. By default, the Dashboard opens.

Menu: Hide or show menu sections. Some advanced sections are hidden by default. Check the box next to the menu item to include it in the menu.
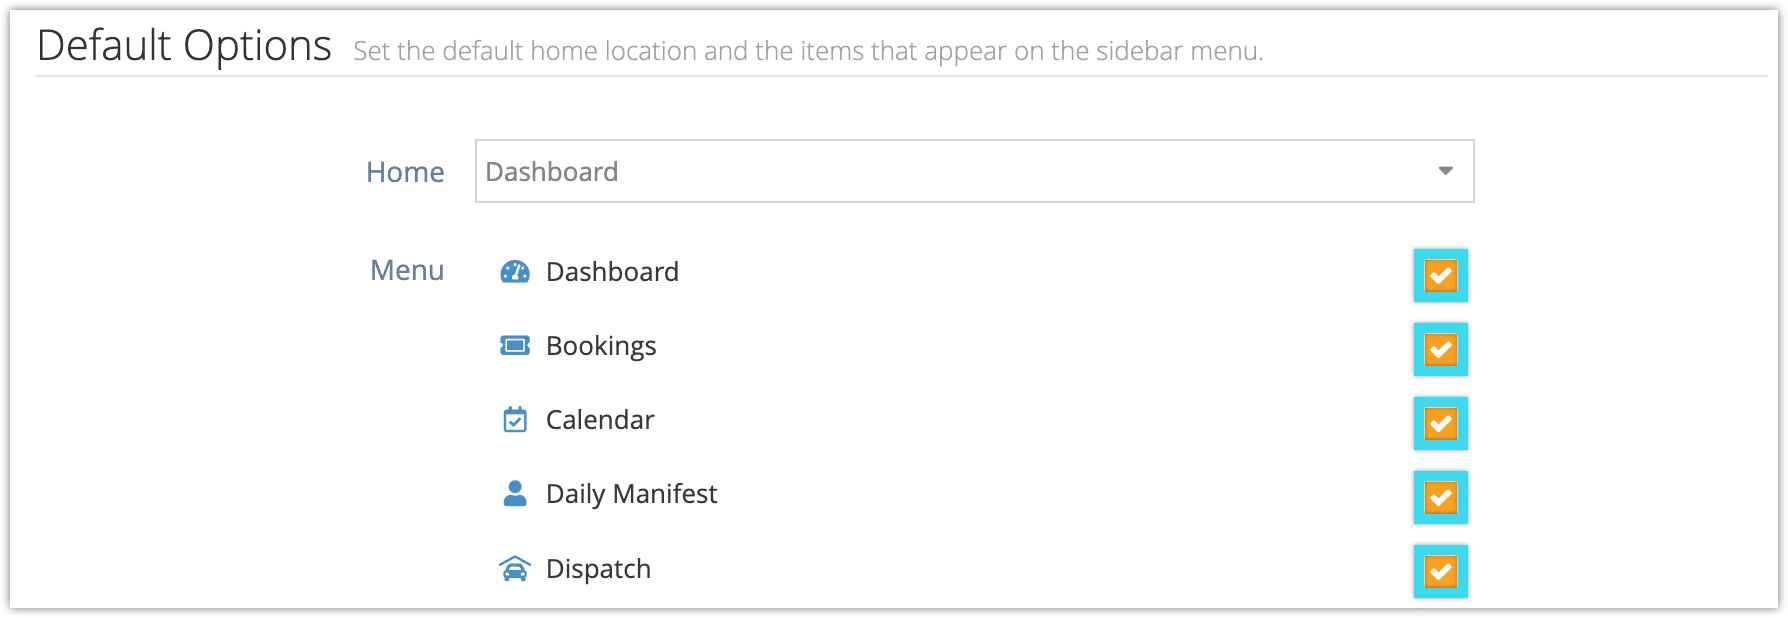
Check the box next to Show to show all menu items. Click Restore Defaults below the menu list to restore the default menu items.
Header
Here you can change your Rezgo admin header, which is shown in the upper portion of the Rezgo interface. By default, this is your company name.

Click Save Changes when you finish editing your Rezgo menu and defaults.