
Pace reports allow you to compare date ranges past, present or future to equivalent ranges in the past. You can see how your upcoming bookings compare to bookings in the same range last year, or compare other ranges as needed.
To create a pace report, navigate to Reports in the main menu.
1. Click Pace under Accounting Reports.
2. Select your first date range (1). You can select Next 7 Days, Next Month (which is the next calendar month, not the next 30 days), Next 6 Months, or a custom range. Click Apply after selecting a range.

3. Select your second date range (2). By default, this will be one year before your first date range, but you can customize it as well by selecting Preceding Month, which is the same range starting one the first of the previous month, or Custom comparison start date, which is the same range starting on the date you choose.
4. Decide whether to compare on the Booked/Used date (the day of the event being booked) or the Created On date (the date the booking was placed) (3).
5. Select any filters for the report results.
– Flags and Status (4): The results will include bookings that match the selected flags and statuses.
– Users (5): The results will include bookings belonging to the selected users.
– Desks (6): The results will include bookings made at the selected desks.
– Service Providers (7): The results will include bookings of inventory belonging to the selected service providers.
– Inventory (8): The results will include bookings of the selected inventory.
6. Click Generate Report.
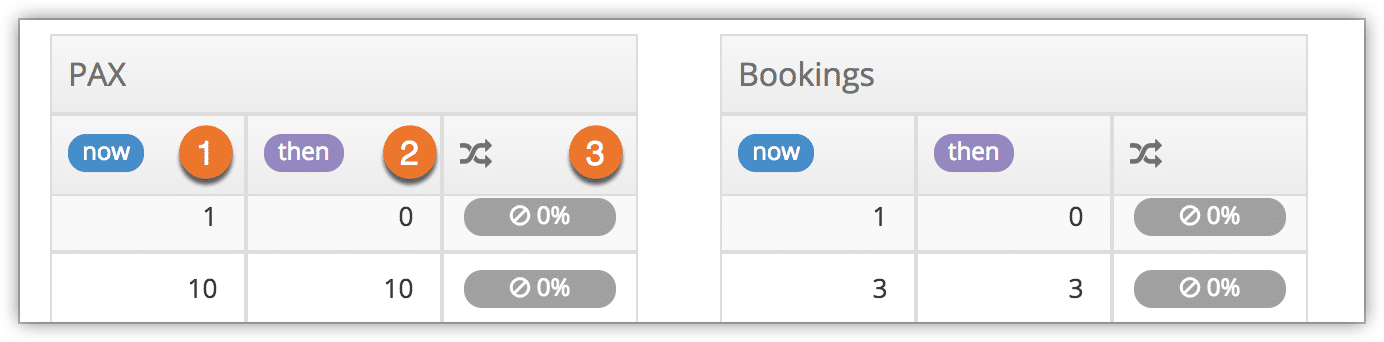
When viewing the pace report, results are shown with Now (1), Then (2) and Change (3) columns. Now columns reflect the dates in your first range. Then columns reflect the dates in your second date field. Change is the percentage difference of the results.
Like other reports, pace reports can be saved, printed and exported, and you can adjust their fields.