
To see a list of tickets sold in the system, you can create a Tickets report.
First, navigate to Reports in the main menu.
1. Under General Reports, click Tickets.
2. Specify a date range by clicking the date field (1). You can choose from This Month, Last Month, Last 6 Months or a Custom Range of dates. This Month includes the current calendar month to date, not the last 30 days.
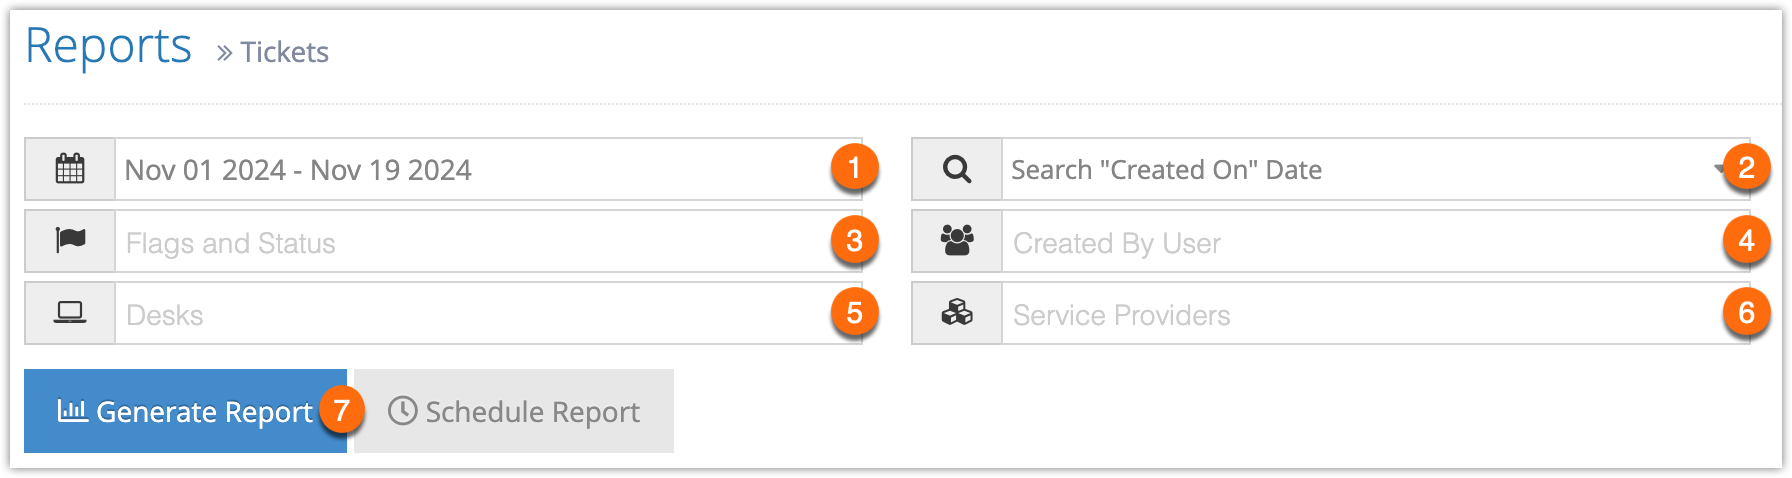
3. Select whether the dates being searched are the dates the booking was created, the dates that were booked, or the cancellation date (2).
4. Select your optional search criteria:
– Flags and Status (3): Only tickets matching these flags or with this status will be included.
– Created by User (4): Only tickets created by this user will be included.
– Desks (5): Only tickets originating at these desks will be included.
– Service Providers (6): Only tickets involving these service providers will be included.
5. Click Generate Report (7). If the results include fewer than 3000 rows, this will bring up all tickets in the range you specified, including ticket numbers, customer name, cost, retail and more.
At this point you can manage the fields of your report, print it or export it to an Excel .csv file. You can also click any line to view the relevant booking’s details.
If the results include more than 3000 rows, you will be prompted to export the report when it completes. You can open the exported report in any program that supports .csv files, like Excel.