
If your employees, agents, concierges or other users share desks, especially desks associated with EMV terminals or other physical payment methods, you can assign them to sales desks in Rezgo. Sales desks can also be associated with locations.
To create a sales desk, first navigate to Users > Sales Desks
1. Click Create Desk.

2. Fill out the desk’s information. Only a name is required.
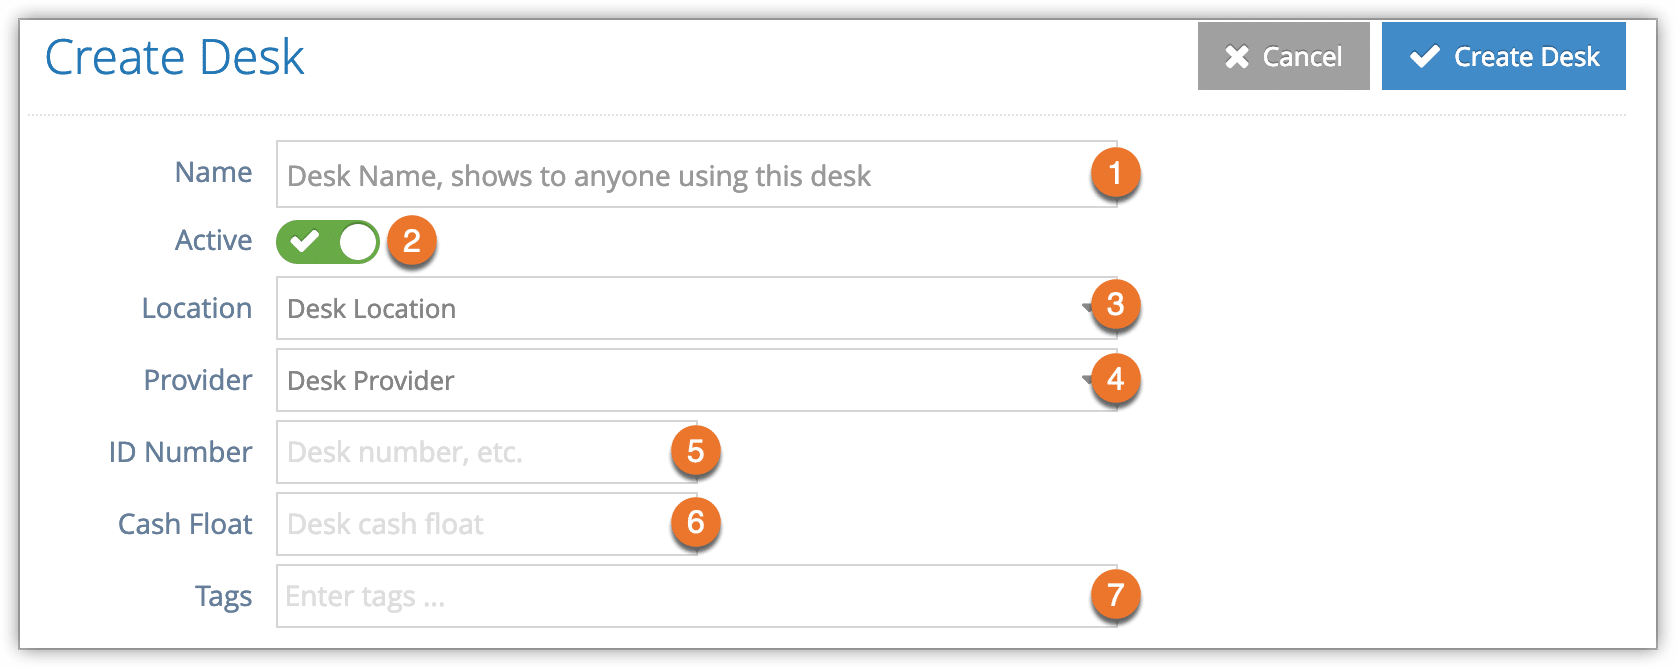
– Give the desk a name (1). This is visible to anyone using the desk.
– Leave the desk as Active if you want to start using it immediately, or toggle it off if you want to activate it at a later time (2).
– Select a location for the desk if you have any locations configured (3).
– Assign a service provider to the desk, if needed. (4)
– Add an ID number for the desk, if relevant (5).
– Enter the total of the desk’s daily cash float (6), if it has one.
– Create or select any tags for the desk to help you search for it in the desks list (7).
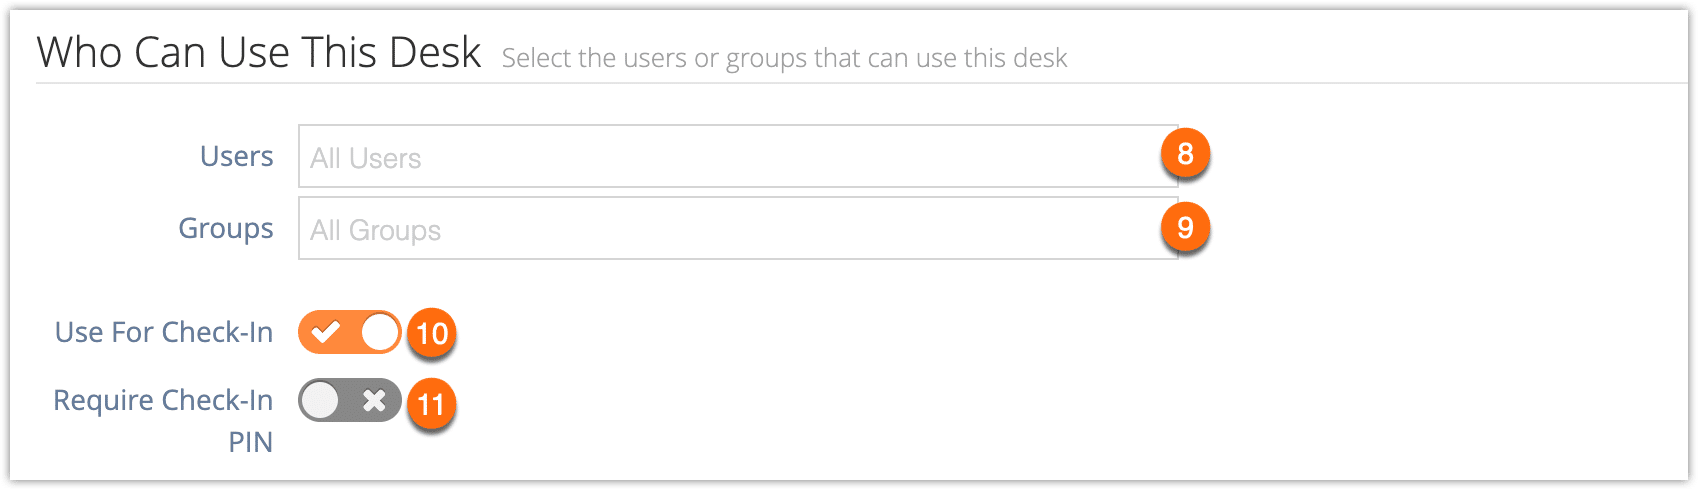
3. Select the users that can use this desk, or allow all users (8).
– Select the security groups that can use this desk, or allow all security groups (9)
– Toggle whether users of this desk should be able to check in bookings (10)
– Toggle whether users of this desk require a unique check-in PIN (11).
4. If you enable Require Check-In PIN, set a unique PIN here.

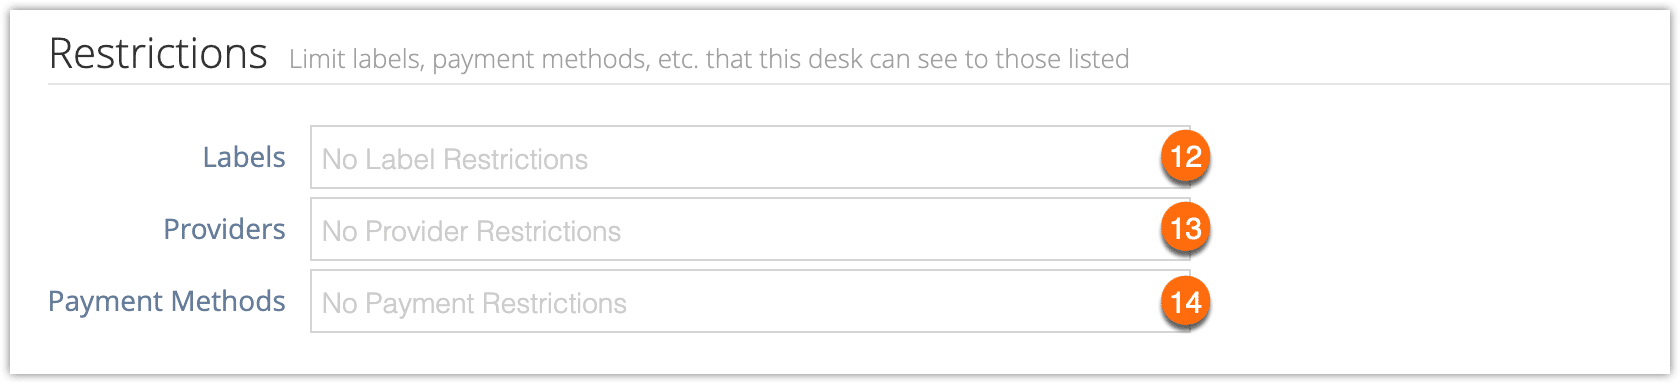
5. If this desk should be restricted to specific Labels (12), Providers (13) or Payment Methods (14), enter them here.
6. Add payment methods that are available at this desk.

7. Select any Booking Labels that should be applied to every booking made at this desk.

8. Click Create Desk.
Once you create a desk, you may want to create a bookmark so users can log into it directly.