
Once you’ve uploaded an image to an inventory item or product, you can make several changes to the way it’s displayed on your Rezgo website. You can crop the image or add a caption. You can change the order your images will be displayed. You can also delete images.
1. Navigate to the edit page for the inventory item or merchandise with images you want to adjust.
2. Tap or hold your mouse cursor over the image you want to edit. This brings up four icons:
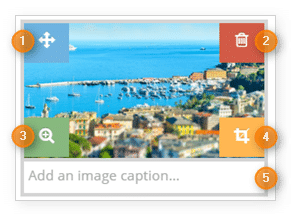
The Sort icon (1) allows you to change the order your images will be displayed. Click it and drag your image to its new location.
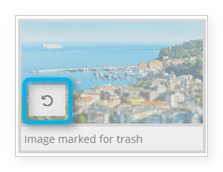
The Trash icon (2) lets you delete your image. It will be marked for deletion, but won’t be deleted until you save your changes. Press the circular arrow if you want to undo the deletion before saving:
The Zoom button (3) lets you see your image at full resolution, which will look bigger or smaller depending on your browser’s window size.
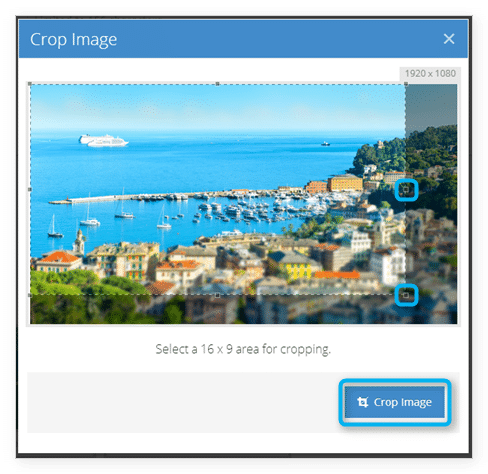
The Crop button (4) lets you select a smaller area of your image for display. Drag the small boxes to change the crop size, or drag from the center of the crop area to move it. Click Crop Image when you’re done:
3. Enter an optional caption (5).
4. Click Save Changes when you finish adjusting your images.