
Custom notifications can be scheduled to go out on dates surrounding a booked date–from two weeks before the date to two weeks after. They can also be sent from one to eight hours before the event.
First, go to Settings in the main menu and click Notifications You Send.
1. Click Create Notification.
2. Enter a name for the notification (1).

3. Select whether or not notifications should be sent automatically when the trigger condition is met (active) or should be manually sent on or after that point (2). Customer notifications will only be sent automatically if the booking is made on the front-end.
4. In the dropdown labelled When, select the correct day in relation to the booked date (3) For example, if you want the notification to be delivered one week before the booked date, select “It is 7 days before the booked date.”
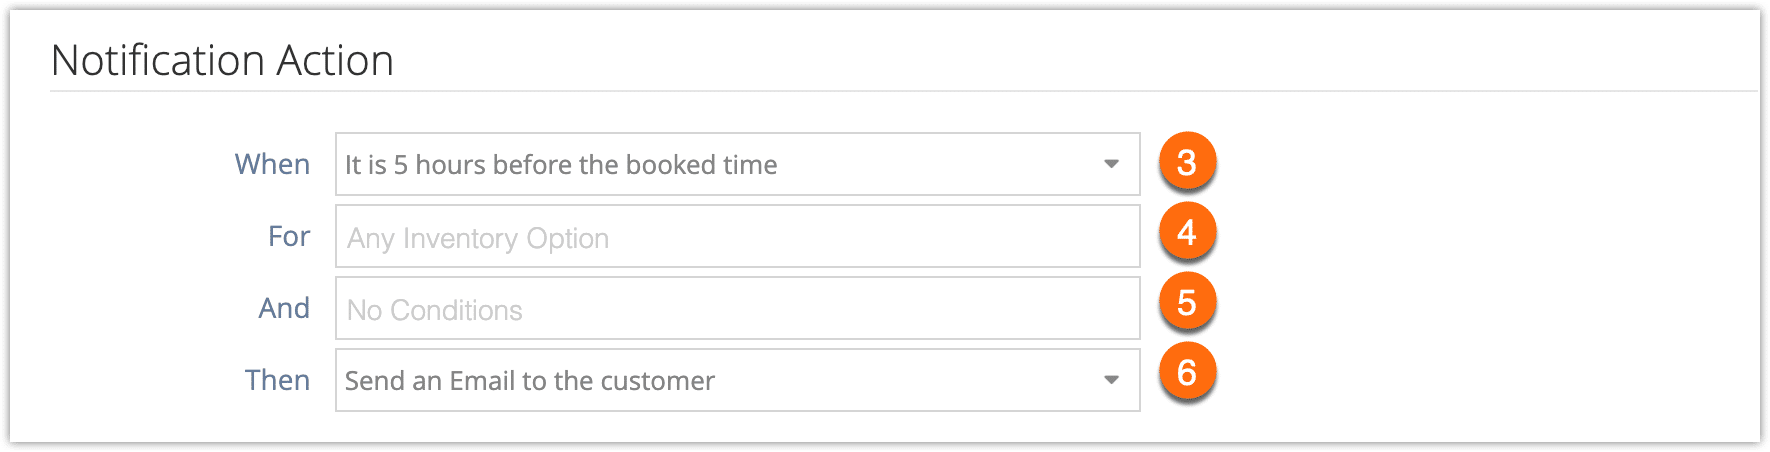
5. In the dropdown labelled For, select the inventory option(s) this notification applies to (4). If it applies to all options, leave this field blank.
6. In the dropdown labelled And, select any additional conditions (5). For example, if the booking’s waivers are unsigned.
7. In the dropdown labelled Then, select the recipient of the notification (6). This can be an email or SMS* to the customer. It can also be custom email addresses, SMS numbers, or a WebHook.
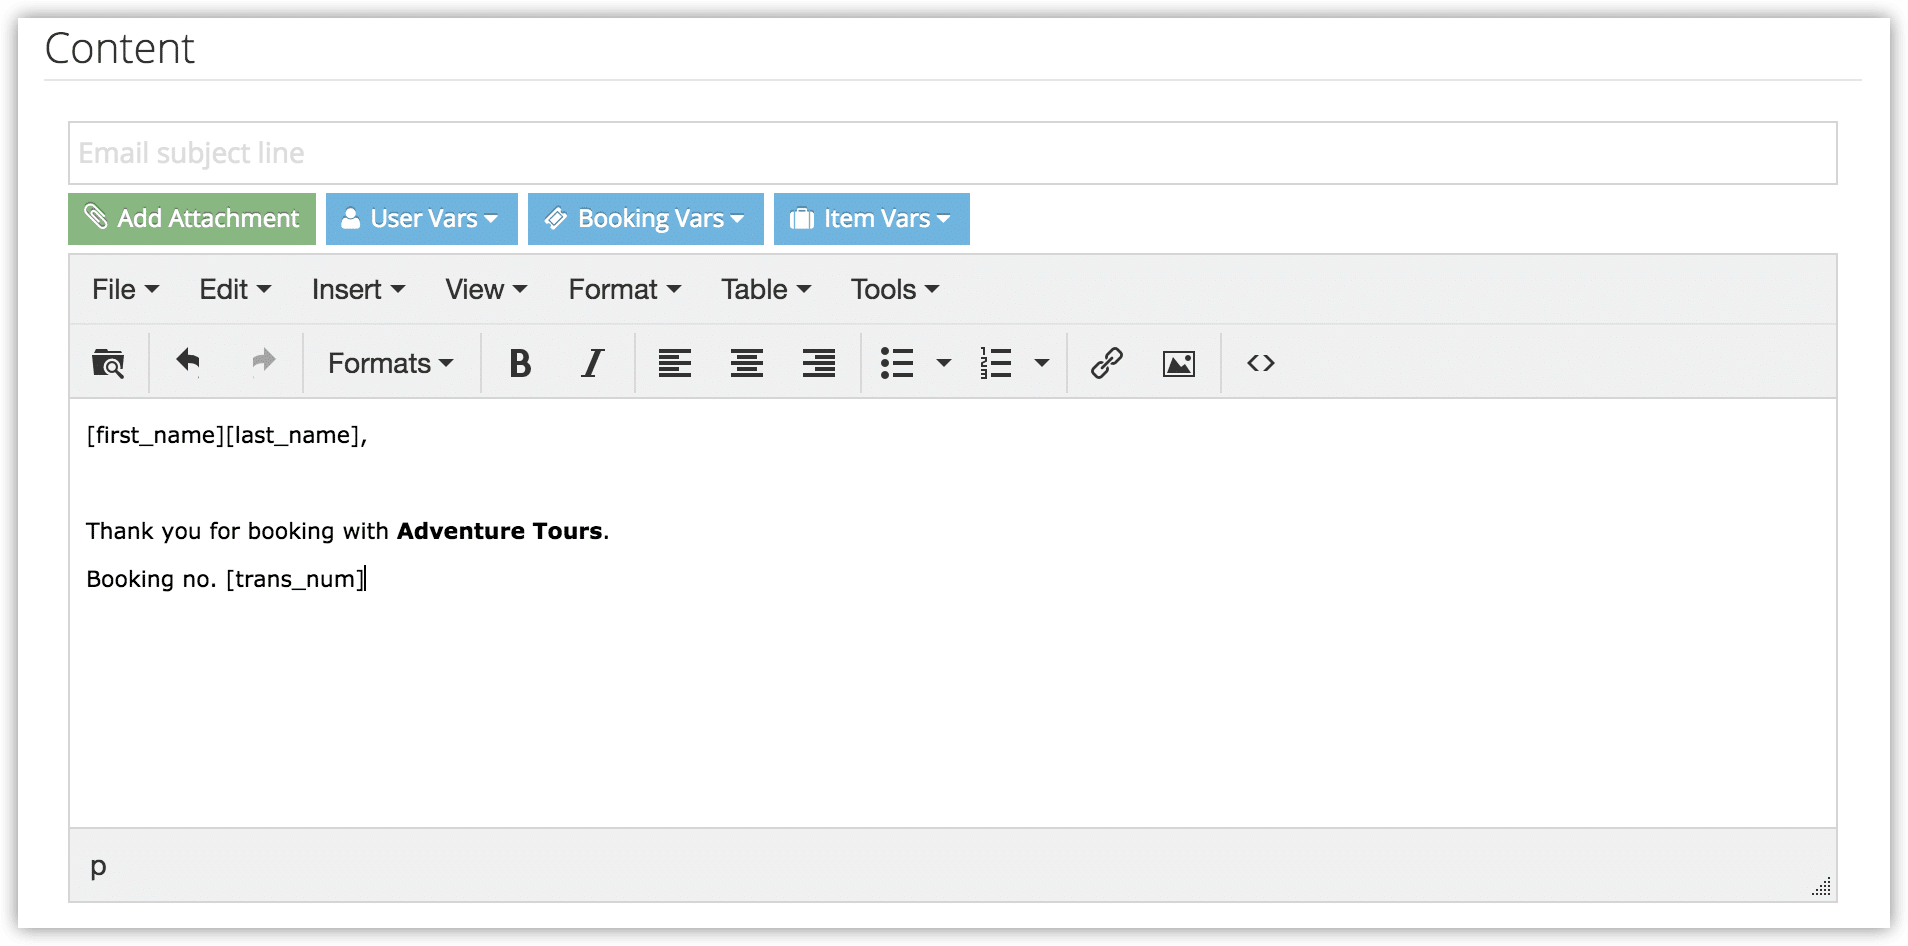
8.Enter the message content. You can find more information about customizing notification contents here.
9. Click Create Notification.
*Please note that SMS messaging needs to be enabled to send SMS notifications. Additional charges apply.