
Resource management allows you to automatically adjust availability based on staff, vehicles, or other limited resources. You can assign a resource to multiple inventory options and have the availability of those options adapt as resources get used.
If you’re wondering how to set up guides, roster guides on existing bookings or events, or restrict events to your guides’ availability, resource management can help. It’s also an important part of how to set up rentals with Rezgo.
To set up resource management, you need to create resources and assign them to inventory.
Creating Resources
Basic Details
To create a resource, go to Resources in the main menu.
1. Click Create Resource.

2. Give your resource a name (1) and description (2) so you can identify it easily.
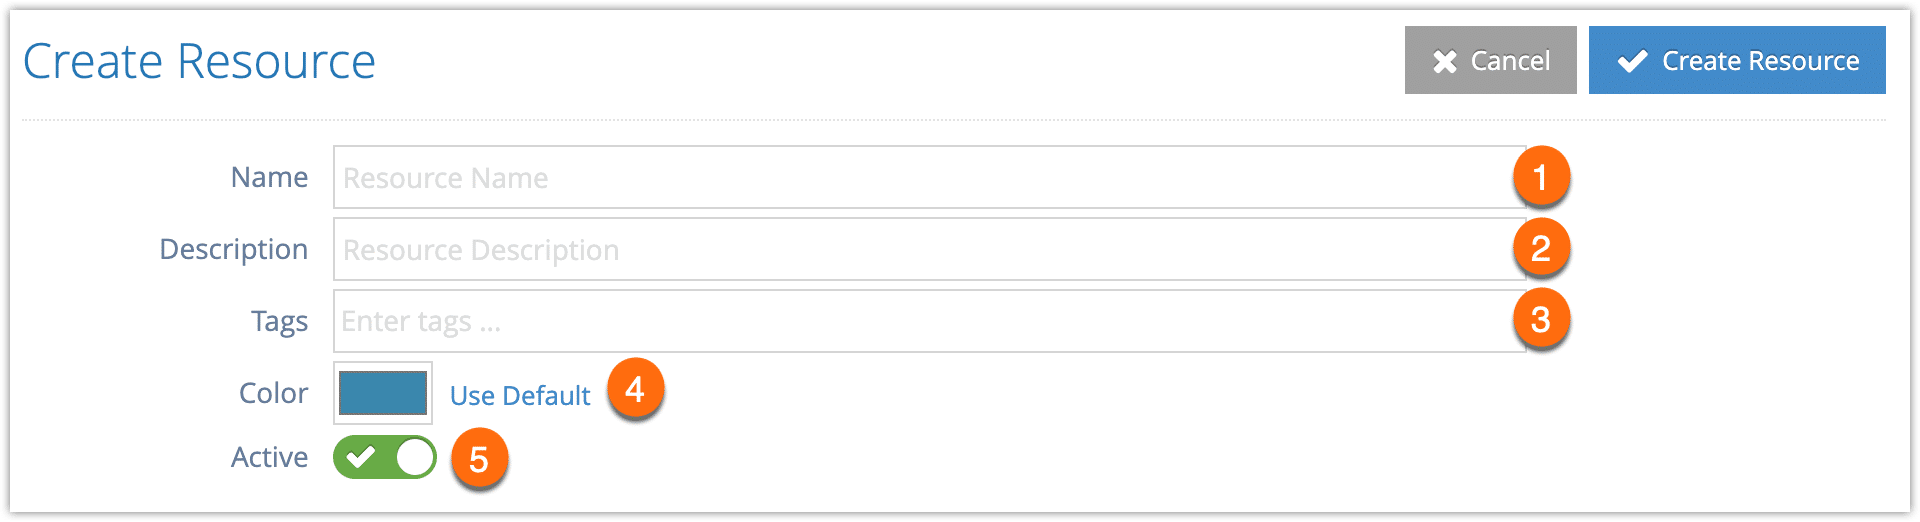
3. Enter the resource’s tags (3).
Tags can be used to search for resources, but they can also be used to add resources to inventory as a group with pooled availability. For example, if you have five boats with different numbers of seats, you could create five resources and tag them all as “boats” in order to attach all your boat capacity to your inventory options.
4. Select a color for the resource (4).
This color will be shown on the resource calendar, so consider choosing one that will differentiate this resource from your other resources or that will group it with similar resources.
5. Leave the resource toggled to active if you want to use it right away, or toggle it off if you want to enable it later (5).
Availability
6. Set the resource’s capacity (1). This is how many spaces a single resource has. If your resource is a lifejacket, it has 1 capacity. If your resource is a fleet of boats, the capacity is the number of seats on a single boat.
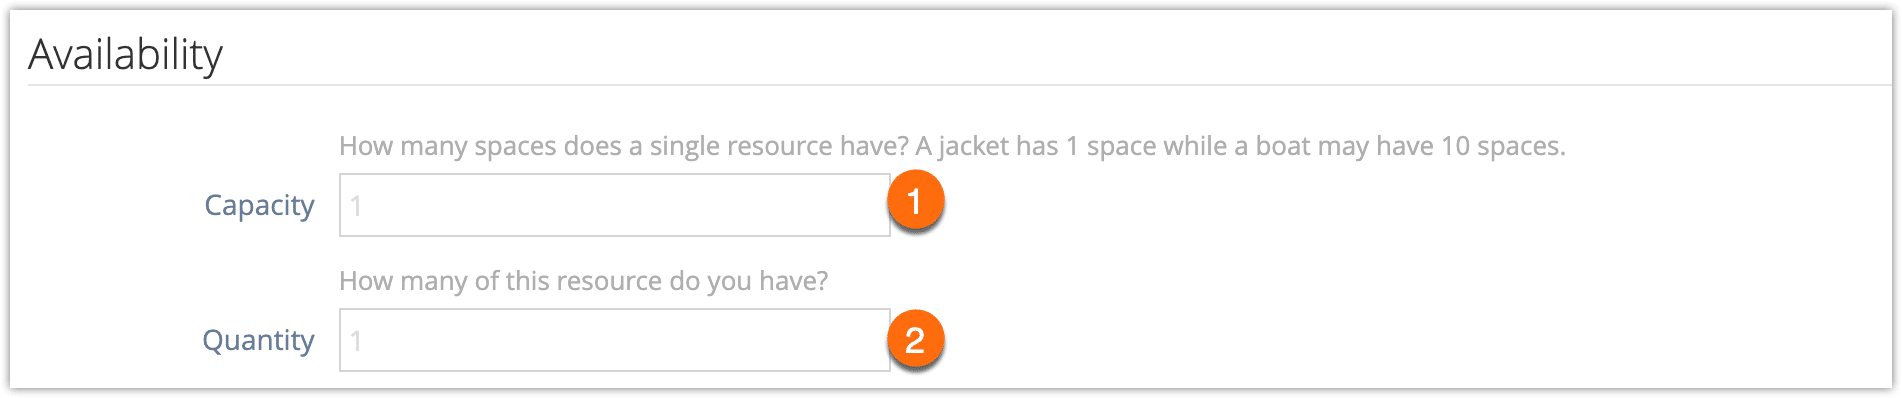
7. Set the resource’s quantity (2). This is how many of the resource you have. So if you have a fleet of four boats with the same number of seats, the quantity would be 4. If you have a single boat, the quantity would be 1.
8. Set the resource’s restock time. This is how long after an event you need before the resource should be available to be booked again.

– For example, if you need 10 minutes after the event’s duration ends to clean up your boat, set the restock time to 10 minutes. If the resource is ready to go by the time the event ends, leave the restock time blank.
– If the resource can only be used once per day, select Restock happens at end of day in the Restocking dropdown.
Notifications
9. You can send an alert when this resource is manually assigned to a booking. To do so, toggle Assigned Alert on and enter comma separated email addresses in the Addresses field.
10. You can also send an alert when a booking reduces the total available spaces of this resource below a specific threshold.
First, toggle Spaces Alert on. Enter the threshold where you want the alert to be sent in the Threshold field, then enter comma separated email addresses in the Addresses field.
11. Click Create Resource.
Once your resource is created, you need to assign it to inventory.
Advanced Resource Settings
The above settings will cover most resource use cases. If they won’t work for yours, you may need to use one or more of the advanced settings.
If used incorrectly, these settings can make your availability significantly more limited than intended, so please take care when toggling them.
Please note that advanced settings will only apply to resources with a capacity greater than 1.
Shared by Groups: This is enabled by default. You should only disable this setting if you always want any booking to book out the entire resource regardless of how many PAX are included in the booking.
For example, if your resources are tables and you don’t ever want multiple parties sharing a single table, you would toggle this setting off.

Shared by Inventory: This is disabled by default. While resources can be assigned to multiple options, by default, once a single quantity of a resource is booked by one option, its remaining capacity can only be booked by that option.
For example, imagine you had a boat with 10 seats assigned to multiple options. The first booking of the first option fills 3 of those seats. The remaining 7 seats are now only available to the first option.
If you’d prefer to let other simultaneous options continue to book those 7 remaining seats, you would toggle Shared by Inventory on.

Shared Duration: This is disabled by default and should only be enabled in a few specific circumstances, so please contact customer success if you’re not sure whether shared duration is right for your use case.
When toggled on, shared duration will allow customers to book a resource’s capacity even if that same resource is already booked for an overlapping event.
For example, if you have a bus for hotel transfers for a 7-day tour, you may want to allow it to take on new passengers for an event that starts on the second day of another tour it’s already booked for, assuming it has the capacity available. In that case, you would toggle Shared Duration on.
But if you have something more like a boat that goes out for a 3-hour tour and doesn’t return to dock until those 3 hours have passed, it’s important to leave shared duration disabled. Otherwise, customers could book that boat’s capacity for an option that starts during the second hour of the tour, and the boat wouldn’t actually be available to pick them up.
