
Rezgo includes a number of informational fields you can fill out for your inventory, like Itinerary, Pickup, Inclusions and Exclusions. If those don’t cover your needs, you can create more.
First, navigate to Settings in the main menu and click Custom Fields.
Here you can see all the existing fields.
1. Click Create Field.

2. Select Inventory Field in the Section dropdown (1).
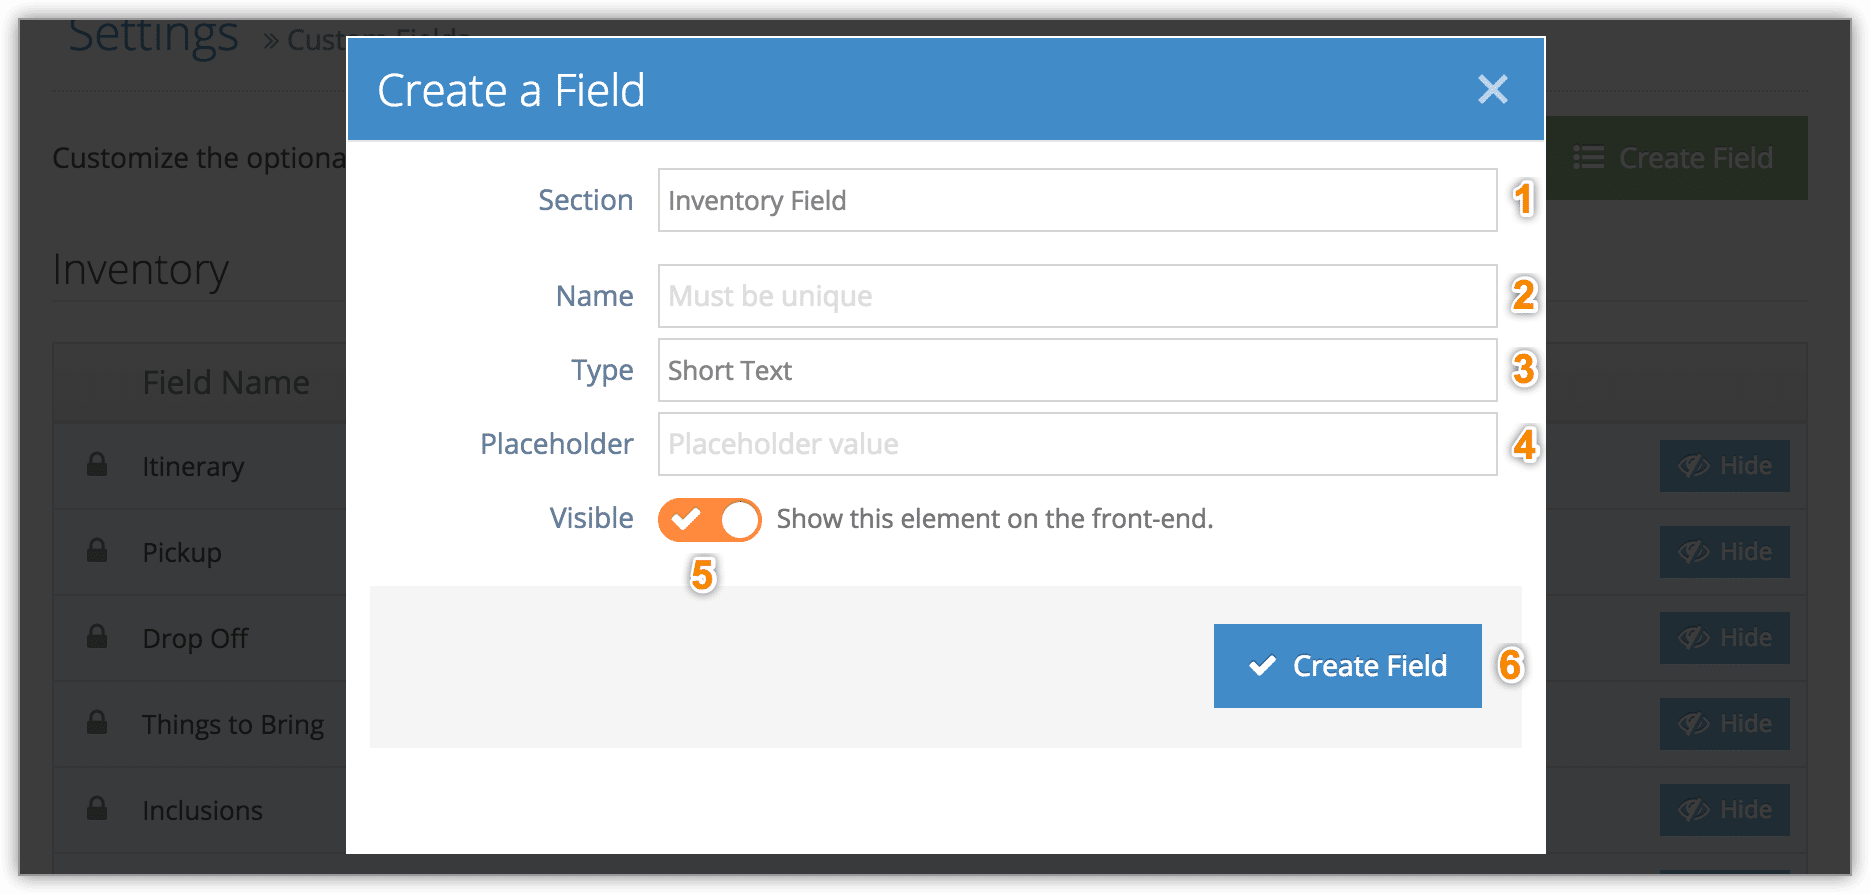
3. Give your new field a unique name (2).
4. Select which type of field it should be from the dropdown (3). You can use large text areas, short text areas, checkboxes or dropdowns.
5. Enter a value (4). This is the set of instructions that will be displayed in this field when creating or editing your inventory.
6. Toggle whether or not this field should be visible on the front-end (5). If this is not checked, the field will only be visible in the Rezgo admin.
7. Click Create Field (6).
The new field will show up when you edit or create inventory items, listed below the default fields.
Note that like other inventory fields, these layout elements won’t be shown on your Rezgo website unless information is added to them when creating or editing your inventory items.