
If multiple people need to access your Rezgo account, you can create unique logins for everyone. This will let you keep your administrator account secure, and keep track of what your users do in your account.
1. Navigate to Users in the main menu.
2. Click Create User.
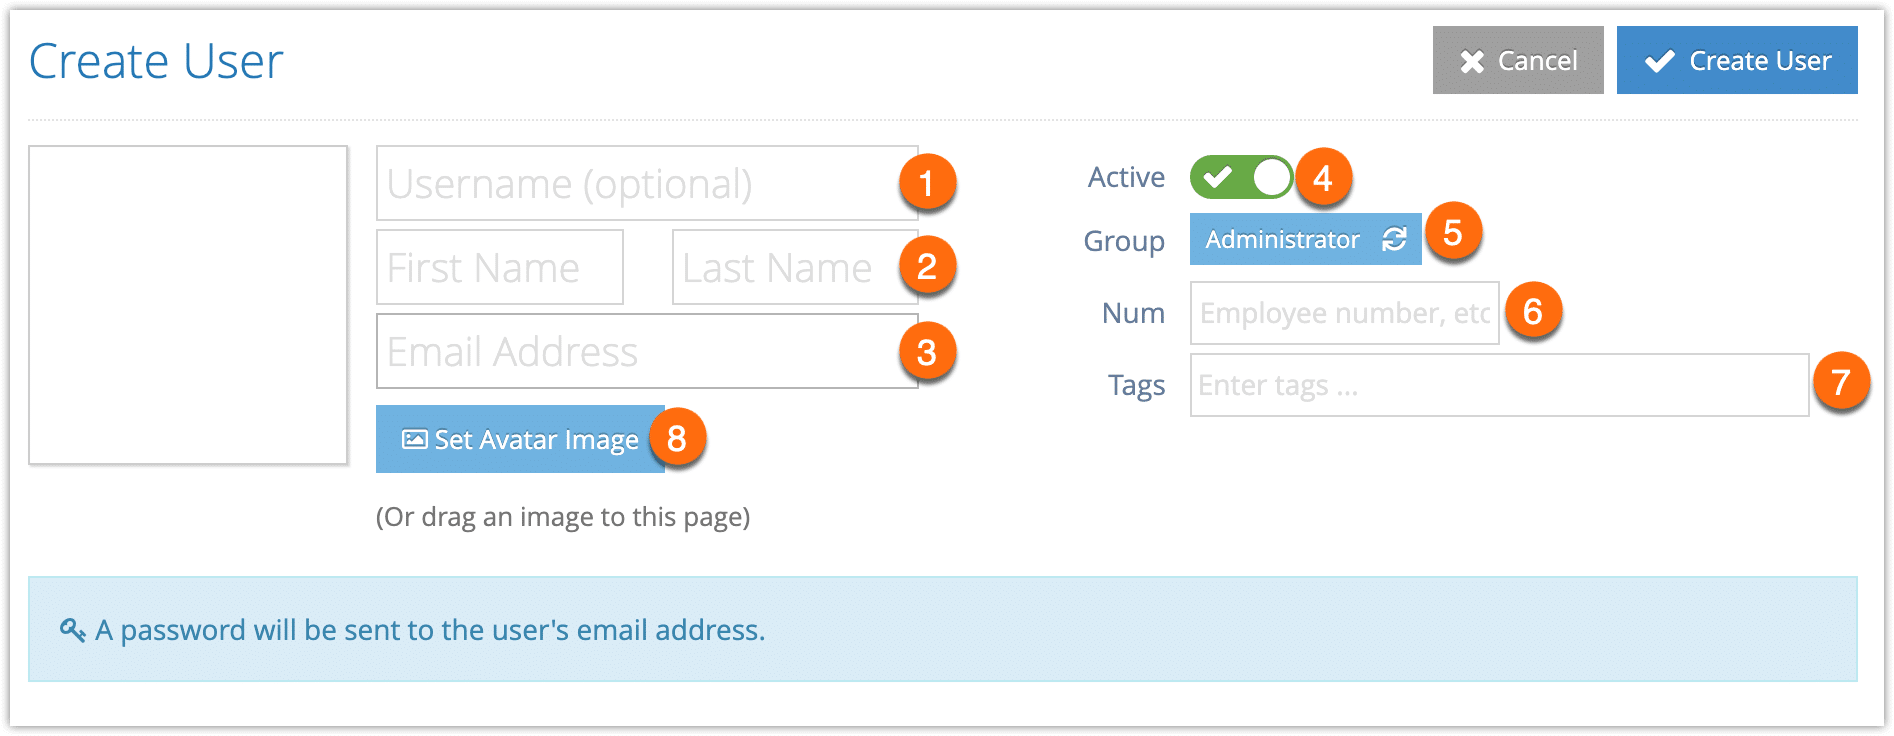
3. Enter a Username for the new user (1). This must be unique to the entire Rezgo system, so you may need more than one option prepared.
4. Enter their first and last names (2).
5. Enter the user’s email address (3). Their password will be sent to this address, so make sure you enter the correct email address.
6. Toggle whether the user should be active (4)—inactive users can’t log in and won’t receive their password emails until you toggle them to active.
7. Click the Group button (5). Select the appropriate security group for the new user:
- Site Administrators have access to everything in your Rezgo account.
- Administrators have access to everything but Settings.
- Product Managers can add and manage inventory and options.
- Booking Managers can add and manage all bookings.
- Booking Agents can only add and manage their own bookings.
You may also have custom security groups to choose from.
8. Continue with the following optional steps:
– Enter any ID numbers you want to associate with the user, like employee numbers. (6)
– Enter any tags that should be associated with the user (7). This will make it easier to search for them.
– Click Set Avatar Image to add an avatar for the user (8).
9. Click Create User.