
Rezgo contacts include a number of details about your customers or contacts:
- Name
- Company
- Contact Information
- Source
- ID or Ref Number
- Address Information
- Notes
You can add additional contact fields. Up to six can be added as contact search criteria. When a contact is attached to an order in the point of sale, custom contact fields will be attached to the booking as well.
To create custom contact fields, navigate to Settings in the main menu and click Custom Fields.
1. Click Create Field.
2. Select Contacts Field in the Section dropdown (1).
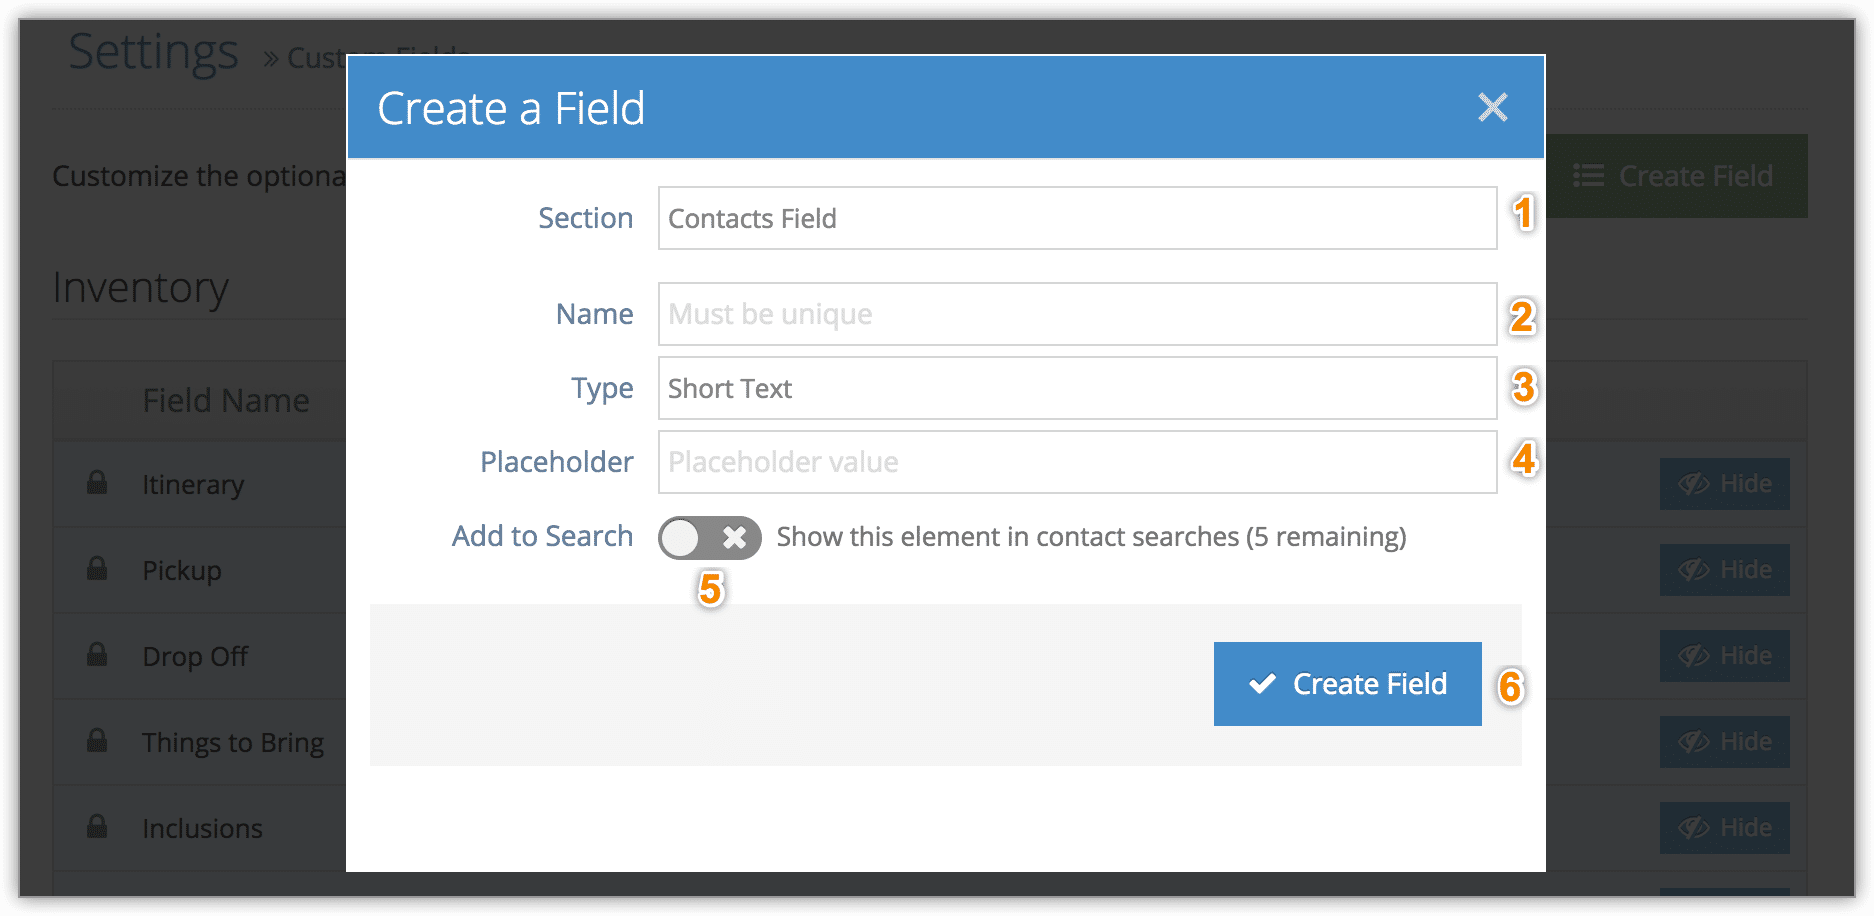
3. Give the new field a name (2). This field name will be shown when adding and editing contacts.
4. Select your field type (3):
Short Text: A small amount of text can be entered in the field.
– Enter a placeholder value (4). This will appear when creating or editing contacts. It should give users an idea of what sort of thing should be entered in the field.
Dropdown: Select from a list of options in this field.
– Enter your dropdown options separated by commas (4).
Large Text Area: A large amount of text can be entered in this field.
– Enter a placeholder value (4).
Checkbox: This field will show its name followed by a checkbox. Placeholder values can also be entered for additional details (4).
Date Picker: A date can be entered in this field.
– Enter a placeholder value (4).
5. Toggle whether or not the field should be searchable (5). If this is checked, the field will show up as search criteria in contact searches. If not, the field’s data can still come up in the search results, but there won’t be specific search criteria for it.
For example, you can create an Instagram field and enable search. Then you can search specifically for information in that Instagram field when searching contacts.

Your company can only have six searchable custom contact fields. After that, you won’t be able to enable Add to Search on a new field until you disable it on one of the others.
6. Click Create Field (6).